
Mid July Vegetable Garden Update
Keep sowing those seeds!
I know I said it in a previous mail/blog post, but I feel I should again remind you to keep sowing seeds for late summer, autumn or overwintering crops. I know it doesn't feel like it with the good weather we are having, but every day really does count at this time of year.
I don't want to upset you but the days are getting shorter, so - unlike spring when you can catch up with lengthening days - our growing window is now steadily decreasing.
If you are pushed for time and just need to get the seeds in, broadcast sow them in a tray of compost (broadcast means just fire them in without worrying about spacing). Once the seedlings come up you can prick them out and transplant them into a seedling tray, as I have done below with some lettuce plants. The other advantage of doing this, of course, is that you end up with a full seedling tray of the strongest plants from your initial sowing.

Sweetcorn in the Polytunnel
As you may know from previous mails, I am growing sweetcorn in the polytunnel this year as part of our video project. I thought you might like to see a couple of photos, as the corn is now at the pollination stage where there is a bit of action.
You can see the plants are very tall, much bigger than anything I have ever grown outside. The variety is 'Swift F1', a quick-maturing sweetcorn that is usually ready 90 days from sowing. If you are growing outside and your corn isn't that size yet, don't be disheartened: polytunnel crops can be 3 weeks to a month ahead.
The plumes at the top of the stalks are male flowers which rain down pollen on the female flowers below when the plants are disturbed by the wind. Obviously there is no wind in the tunnel so I have to give the plants a shake every now and then to make sure even pollination takes place.
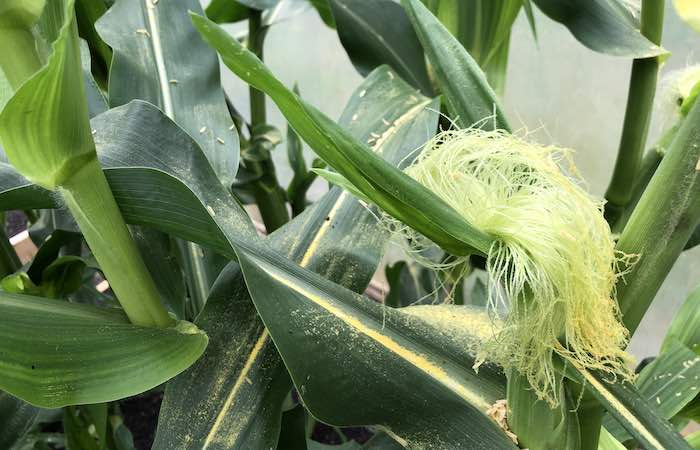
The image above shows the silks of the female flower which receive the pollen; they are sticky threads which are individually linked to a potential sweetcorn kernel, so each thread needs to receive a dusting.
All the yellow stuff on the leaves is pollen; there is no wind in the tunnel to blow it away so you can see just how much each plant produces.
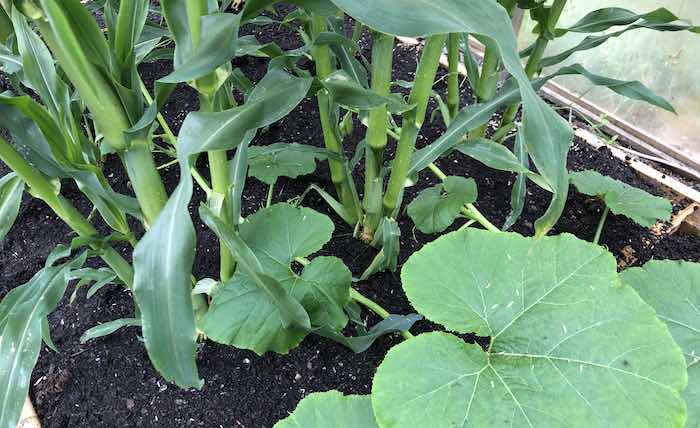
This picture shows Squash 'Crown Prince' which is starting to grow through the sweetcorn. This follows an old practice originally used by Native Americans known as 'the Three Sisters' (beans are the third, absent, sister here). The idea is that the space-greedy squash can co-exist with sweetcorn: the squash can use the ground while the sweetcorn crops higher up on its lofty stalks.
The large squash leaves also provide shade which helps conserve moisture in the soil. This is a plus because sweetcorn grows fast and needs water, especially when the silks go brown (indicating that the cobs are ripening).
You can't tell from the photo but I have also added a fresh layer of garden compost around the sweetcorn plants to give them a boost. Each plant usually produces 2 cobs, one smaller than the other. The extra feed at this stage helps ensure the second smaller cob grows to a worthwhile size.
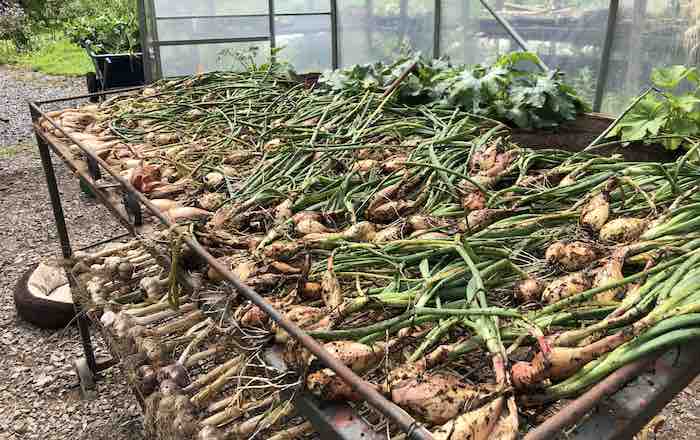
Drying shallots
As you probably know, onions, shallots or garlic are left in the sun for a week to 10 days after harvesting in order to begin their drying process. Unfortunately, for many of us, this is not a very successful process if there is more rain than sun so they may need to be dried undercover.
Fortunately I have plenty of room for this in the polytunnel: above you can see shallots on the top tier of the drying rack and garlic below. I should point out one needs to be careful on hot, sunny days as high temperatures can partially cook your produce. By chance, my drying rack is on wheels (I can't remember where it came from) so I can wheel it out on sunny days and back in if rain is forecast.
After the initial drying period crops can either be plaited or tied in bunches, and are better stored in a well ventilated space away from direct sunlight.
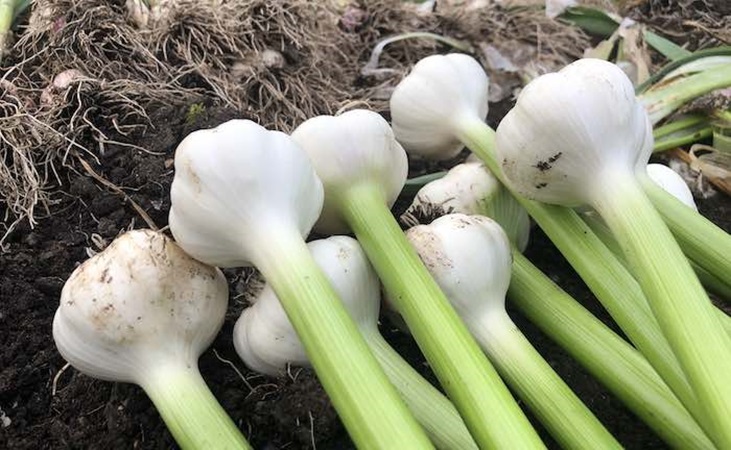
By the way, if you want your garlic to look pretty for storage you are best tidying up as soon as you pick. This is 'Lautrec' variety pictured above, which I have cleaned up by cutting off the roots and peeling off one or two leaf layers to reveal a pristine bulb (before I got them all muddy again).
You should do this as soon as you lift the garlic: the roots will be soft and so much easier to cut, and the outer skin on the bulb will come off easily. Even after a day of drying, the skin will stick to the bulb leaving you picking at it in the same manner as picking a label off a jam jar (with similar levels of success and frustration).
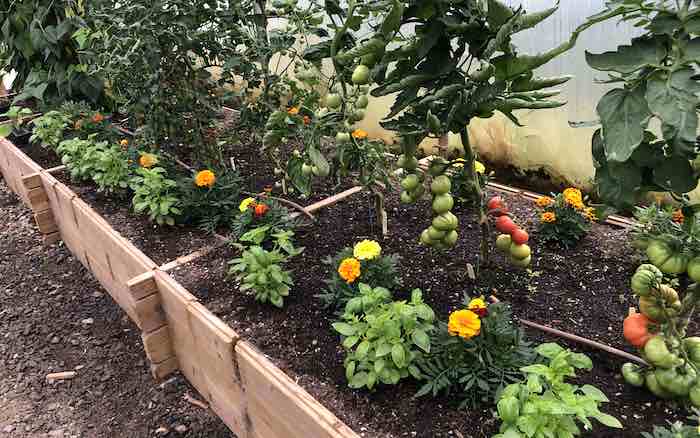
Companion Planting Marigolds with Tomatoes
I am often asked to write an article about companion planting but I haven't to date, mostly because I haven't had great success with any of the commonly recommended partnerships so I can't recommend them.
I do, however, grow marigolds with tomatoes as they are said to exude a substance called limonene that deters aphids. I don't know if this is true but I have got so used to growing them that I think tomatoes look naked without them and sow them together by habit every year. The plants between the marigolds are basil, which also pair well with tomatoes both in the ground and in the kitchen.
You can also see that I have removed a number of tiers of lower leaves from my tomatoes already to improve airflow and to help the fruit to ripen. Just remember that any old, dying or tightly curled leaves are adding very little to the plant in terms of photosynthesis; it is the higher tiers that are doing all the work so, in my opinion, you are better off removing them.
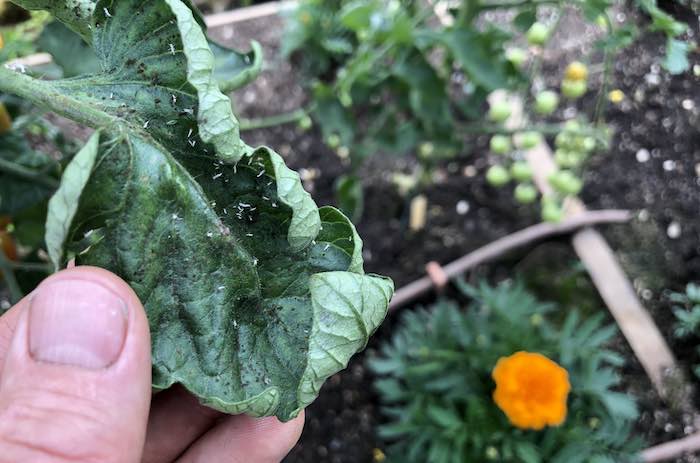
Whitefly on Tomatoes
So, you know how marigolds deter aphids from tomatoes? Well, here are some aphids on my tomatoes (with a marigold in the background).
The aphid in question is whitefly which I rarely have trouble with but - if reports are to be believed - are very common this year. If kept under control and plants are growing healthily, whitefly is not a big deal and can be easily controlled with a strong blast of water in mild cases or with an organic spray for a more severe attack.
Pests, including aphids, will always be more of a problem if plants aren't growing well - so attend to your soil nutrition first and any pest issues should be minimal.
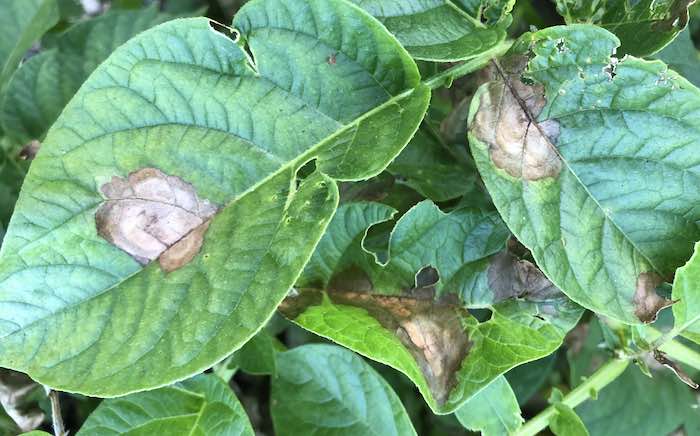
Late Blight
We are well into late blight season now, with almost perfect blight conditions for me over the last few days: warm and wet. Predictably I am seeing blight starting on early potatoes which are particularly susceptible. There is none so far on maincrop blight-resistant varieties, but there will be if I'm not careful.
If you see the tell tale signs of late blight (on my potatoes above), make sure to remove and dispose of any infected leaves to slow the spread through the crop, it will make a very significant difference. Once you see blight appear I would check every two days and remove as necessary.
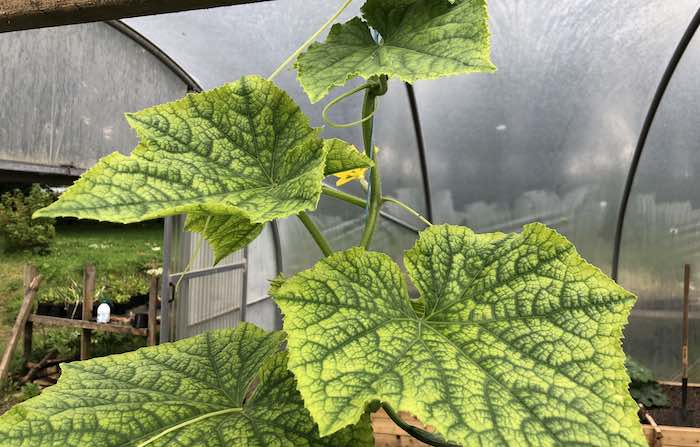
Cucumber Nutrient Deficiency Problem
Last week we looked at suspected manganese deficiency in my cucumber plants, which I figured was likely caused by watering with hard or alkaline (high pH) water. The action I took was to water with a dilute vinegar solution (4 tablespoons to 10 litres of water), which has made a difference as you can see above and below.
I only treated one of my two cucumbers as it was possible that the vinegar would kill the plant (it is the active ingredient in most organic weedkillers), but thankfully the experiment went well. You can see the stark difference between chlorotic leaf cells and green leaf veins (above) and the more calm looking leaves below, as things get back into balance and the chlorophyll returns.
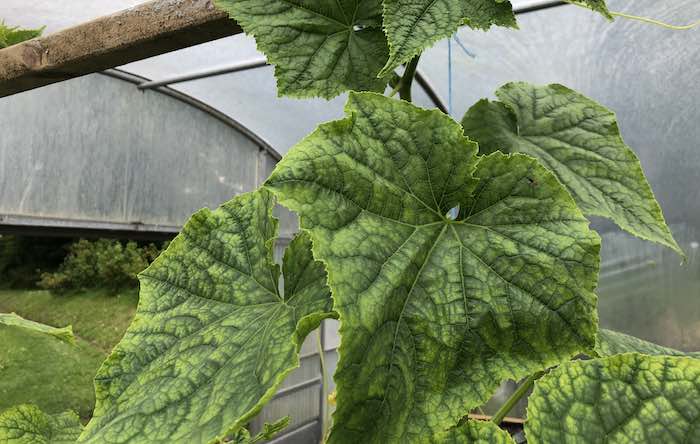
I had the same issue on bush tomatoes growing in a tub, where I tried using Hydrangea blueing agent (aluminium sulphate) as it is acidic - this also worked. You are probably aware that Hydrangeas will only flower blue or purple on acidic soil; otherwise they go pink. If you are growing on neutral or alkaline soil you can turn them blue with aluminium sulphate as it makes the soil more acidic. Anyway, it worked on the tomatoes.
As a footnote, because her book 'Grow Your Own Vegetables' is the first place I go when I am in a jam, I thought I would be cheeky and ask Joy Larkcom-Pollard if she had any experience with alkaline water and how to deal with it. As it happened she hadn't had a similar water issue, but told me about having pH problems when growing plants against an old whitewashed wall in her greenhouse. Traditional whitewash is made from slaked lime (calcium hydroxide), which of course is very alkaline, so watering near the wall resulted in alkaline runoff and struggling plants in the immediate vicinity (those planted further away were fine).
Joy also pointed out that her garden soil was alkaline when she and her husband Don first arrived, but by adding tonnes of compost over the years it is now probably back to neutral, as compost has a mild acidifying effect.
Whitewash is so rarely used these days that it seems unlikely many of you will have the same issue, but it is another interesting example about how pH affects plant growth. Is is always well worth checking soil pH when starting a new garden, as some plants do better than others depending on where you are on the scale. A test will give you a good indication of what will naturally grow well in your garden or if you need to correct the balance.
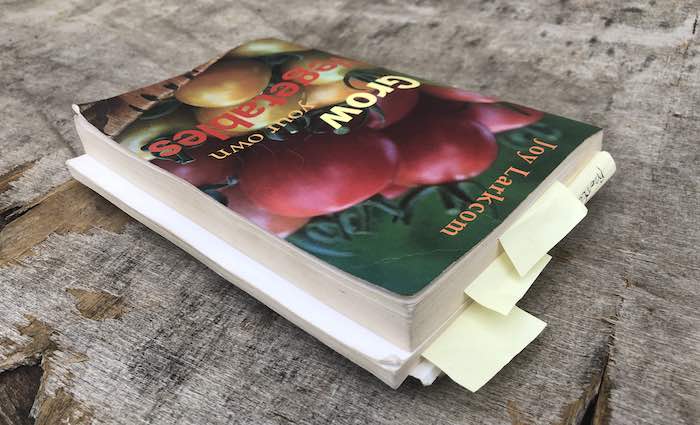
Also, I have said it before and I will say it again, Joy's 'Grow Your Own Vegetables' is an essential book for any keen vegetable grower and one I turn to time and time again. That is my own falling apart and dog eared copy above which I wouldn't be without. I think we sell it for around €10.00 which, I would suggest, is the best tenner you will ever spend.
Pea Greenshaft
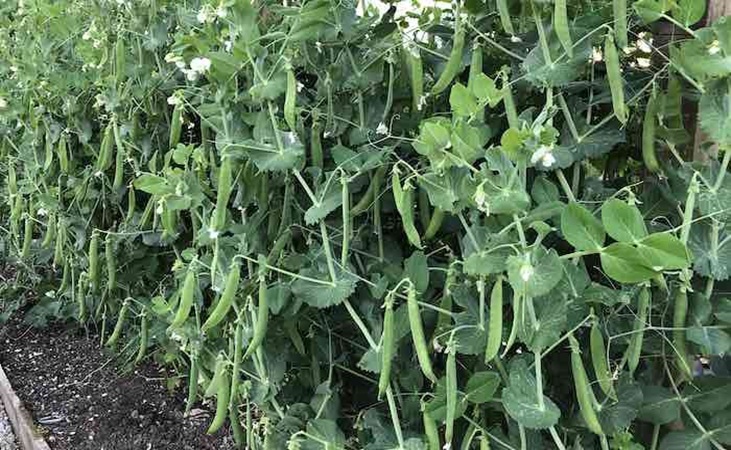
My peas this year are doing very nicely, with heavy crops of all 3 varieties I am growing. Pictured above is Hurst Greenshaft maincrop. I don't have anything terribly insightful to say about them (what's new?) other than it is important to keep picking peas to keep them productive. Unless you are growing peas for drying, picking when slightly immature yields much sweeter peas anyway so it's best to pick often to get them at their best.
Pea Shiraz
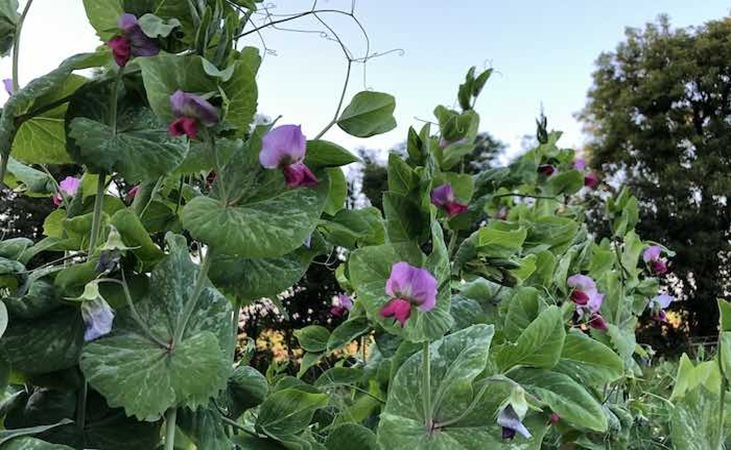
To finish up, here's an evening shot of my mangetout pea 'Shiraz' looking just as impressive as a sweet pea flower. 'Shiraz' also produces purple pods so another of those varieties that give a thrill to the home grower but are generally not available anywhere else.