The Ultimate Guide to Vegetable Harvesting Part 2
Here begins Part 2 of our guide to vegetable harvesting, going in neat alphabetical order. Knowing when to harvest can be just as important in its own way as growing, tending to plants, irrigation and so on. Timing, as they say, is everything. In Part 1 we left off with Kohl Rabi, so next up it's Leek. Here we go....
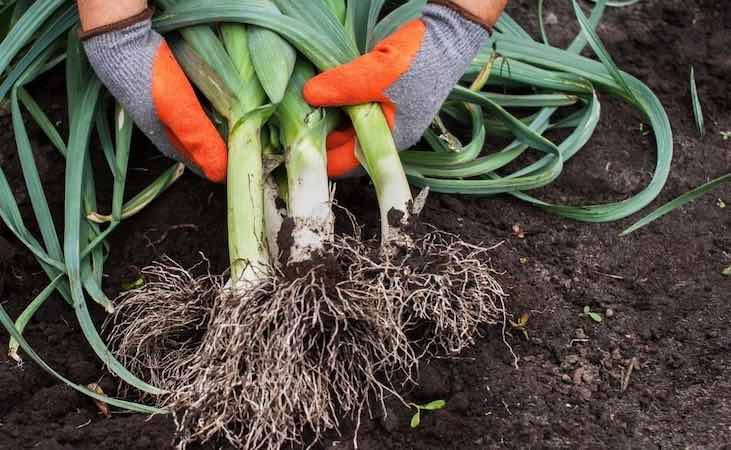
Leek
Harvest August-May
Leeks are sown in March or April depending on what variety you are sowing and when you want your leeks to be ready. The earliest crops are in August from long stemmed summer types which are followed by more stocky winter varieties which can bring you right through to April the following year.
Each variety has different attributes but, broadly speaking, the summer types are long and light green in colour while winter leeks are short and dark blue/green. The reason for the short stems in winter is that longer shafts above ground are prone to frost damage, this is why it is important to sow the right variety for the time of year you wish to harvest.
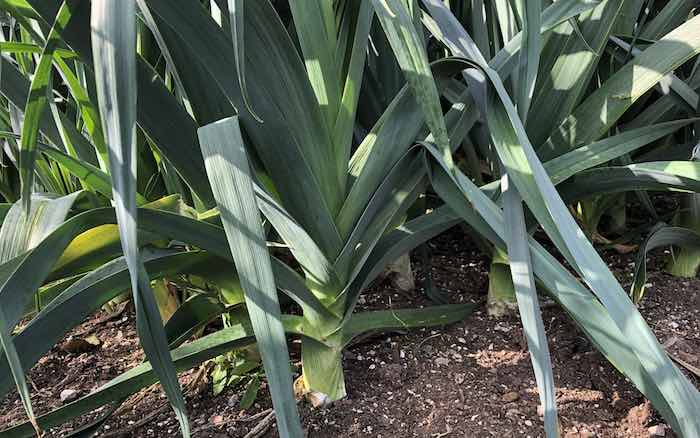
Leeks can be harvested at any time once they are large enough to make a meal, obviously the longer they are in the ground, the larger they get. It can be beneficial to take an early harvest of the weedier looking leeks (especially if growing in clumps rather than rows of single leeks) as thinning will increase airflow somewhat and may help reduce the chances of rust ( a fungal disease effecting alliums).
The harvesting method will depend on how you planted your leek seedlings in the first place, whether deep or shallow planted. Traditional deep planting (done to whiten or 'blanch' the shafts) involves burying half the seedling in the ground which, of course, leads to a deeper root.
To harvest shallow planted leeks in loose, well composted soil; simply give a gentle pull to release the roots. In heavier soils, or with deep planted leeks, you may need to slide a trowel under the base of the plant to sever the roots but take care not to spear the base of the leek.
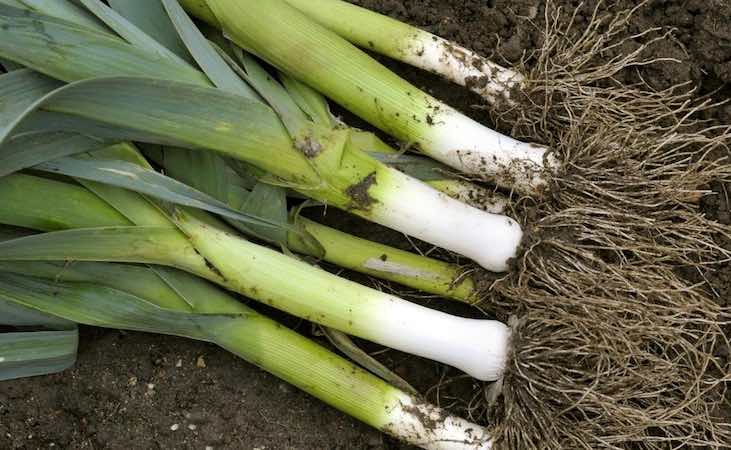
Don't worry if your leeks don't look as beautiful as those photos you see of snow white, freshly harvested beauties laid out in the garden, there is a minor deception going on there. Unless you cleaned up your plants in the weeks leading up to harvest, there will be a layer of dying leaves around the shaft which spoils their appearance. Just like leek photographers do, peel off and discard a layer or two and bingo, you will be left with a pristine leek.
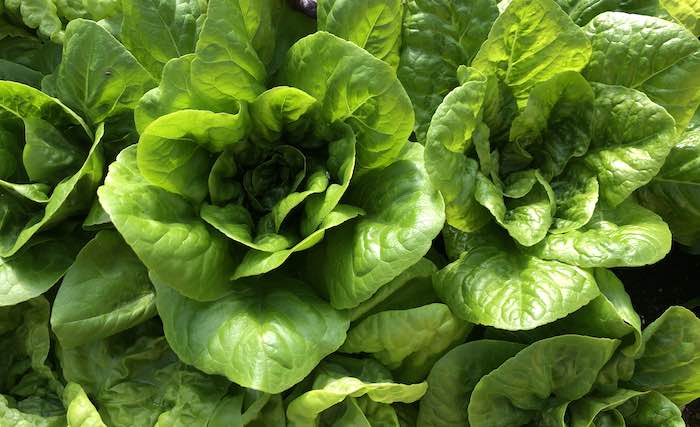
Lettuce Harvest
May - October
Lettuce has a long sowing window, from March to early August for most varieties and a little later for winter lettuces. Typically a head of lettuce can be harvested 8-12 weeks after sowing while lettuce picked as 'cut and come again' crops can be first picked after 7- 8 weeks.
If a full head of lettuce is harvested, the remaining stem and roots will be unlikely to produce new leaves (because the growing tip has been removed) and the plant is termed as spent and will need to be replaced. In the case of 'cut and come again' harvesting, only 3 or 4 leaves are taken from each plant while the head continues to grow and produce fresh leaves.
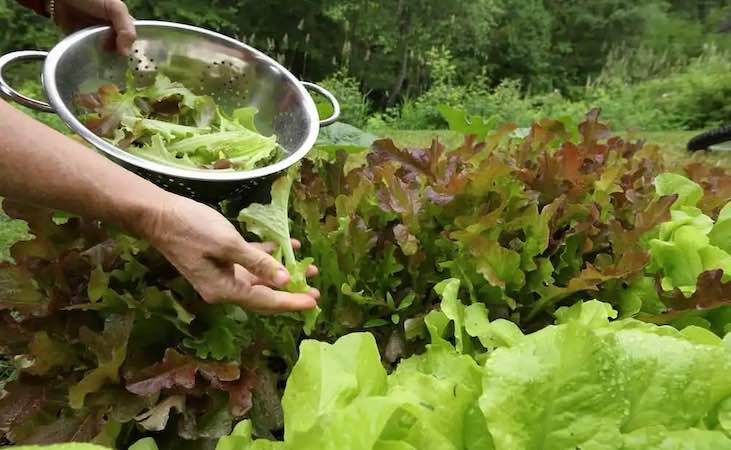
Lettuces for regular leaf harvesting are ready when plants are large enough that the leaves are beginning to touch their neighbours (assuming they are planted 20-25cm each way). To harvest, remove the larger, lower leaves from the plant always making sure to leave 4 or 5 younger leaves in the centre to grow on. Leaves are removed by holding the base of the leaf and pushing downwards to break it off. Avoid using a knife as you will likely damage the base of the leaves you want to keep. A scissors isn't great either as it will leave a stump which may rot.
To harvest a full head of lettuce, cut the stem at soil level and remove the whole plant. Their are advantages to both harvesting methods; 'cut and come again' extends the harvest over many weeks while harvesting a full had of lettuce allows the heart to be eaten which, from a sweetness point of view, is probably the best bit.
Onion
Harvest Late May - August
There is a little bit more to onions as regards sowing dates (and therefore harvest times) as we have the option to sow or plant seeds or sets. We also have standard onions which are harvested in the year they were sown or planted and overwintering types that are started in Autumn and are ready to lift in early summer the following year.
An onion set, if you are new to all this, is simply an immature onion about the size of a large marble. Sets were lifted the previous year at about a third of the way through their growing cycle, stored for winter and re-planted the following spring. The advantage is that sets are easier to grow, are started later than seeds and are ready a month earlier.
View Onion 'Senshyu Yellow' Autumn Sets
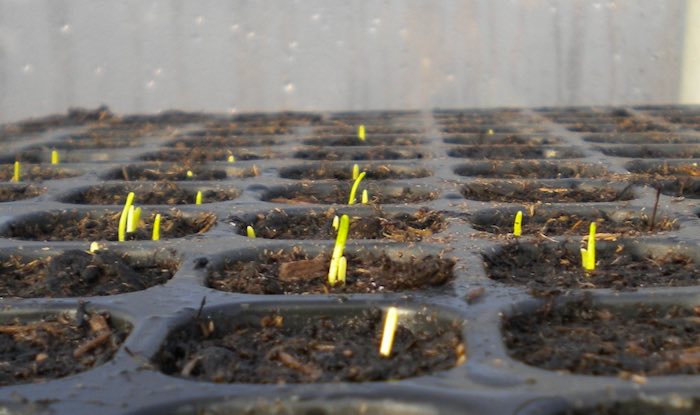
Seeds are trickier to get going as they need to be sown in modular trays indoors in February and planted out in late April. You need heat to germinate them and preferably a polytunnel or greenhouse to keep them protected until April but the advantage, in my experience, is a more uniform crop that is less likely to bolt (run to seed). I find red onions in particular are better grown from seed as reds are more likely to bolt than white onions.
In a given season, the earliest harvests are from the overwintering types which are ready in late May followed by spring sown sets in July and finally spring sown seeds in August.
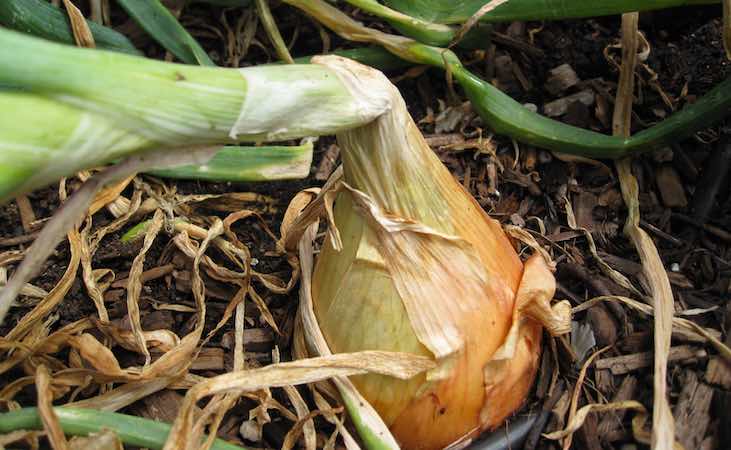
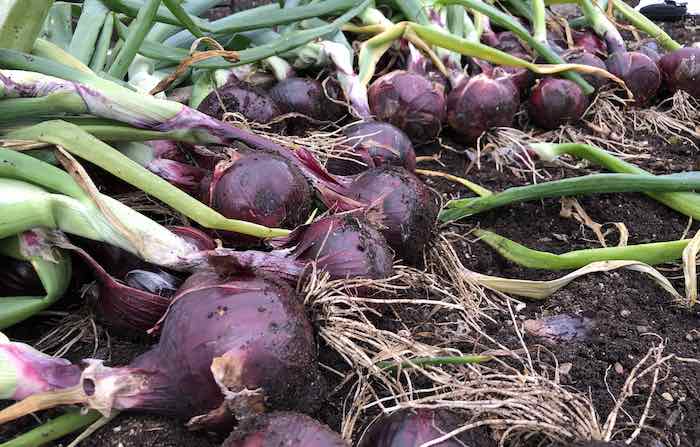
You will know when onions are nearing harvest time when you see the foliage start to lean over as shown in the image above. Once about 25% of onion stems have fallen, you can push over the rest by hand. The reason for manually pushing over onions is that it causes the stems to die back making them store better; what you don't want is thick and juicy stems which will be prone to rot during the drying process.
The onions are lifted a week or 10 days after the foliage has fallen by gently pulling or using a trowel to slice some of the roots if bulbs are being stubborn. Onions need to be dried after harvesting which means laying them out in the sun in good weather or drying them in a greenhouse or polytunnel if it is wet.
Oriental Salad Leaves
Harvest April/may and August to May.
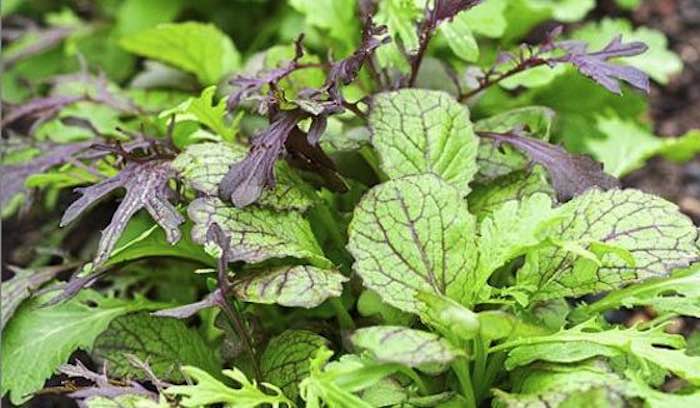
Oriental salads are the stars of the cooler months as they are relatively hardy so give greens at times when there are few other options about. Technically they could be sown in summer but they will give little in terms of harvest as this is the time that they are programmed to run to seed.
As regards harvesting, Oriental salads are generally ready 6-8 weeks after sowing and, like lettuce, are a 'cut and come again' crop that can be picked over a long period. Due to summer flowering, you will get more from late summer and Autumn sowings as they produce leaves in Autumn, usually survive the winter and provide more greens up to around mid May before running to seed.
View Oriental Salad, Mustard 'Green Frills'
As 'cut and come again' crops, Orientals are picked in the same way as you would lettuce. Many of the varieties in this group have a peppery flavour (e.g. rocket) to some degree, if you like hot flavours pick older leaves, if you prefer mild tasting leaves, pick them young.
Parsnip
Harvest September - April
Parsnips are the classic winter vegetable because they will sit in the ground until needed and taste best after a frost. They are sown from March to May depending on how big you want them and what the spring weather is like where you are (sow late if it's cold) and can be harvested from September right through the winter. September parsnips are smaller obviously and not as sweet. The following year, keep an eye on any remaining roots in mid March for new leaves starting to grow and harvest within the next few weeks as the plant is beginning it's flowering cycle.
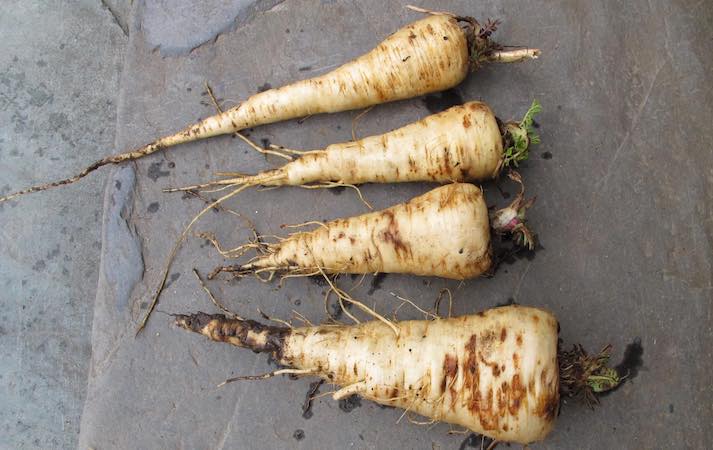
Parsnips are a deep root crop (see the whopper from my garden last year, harvested late in mid April) so you will likely need to loosen them before pulling. To avoid disturbing the surrounding soil too much, slide a spade down beside the root and pull back on the handle while pulling the parsnip from around the shoulder.
Pea
Harvest June - July
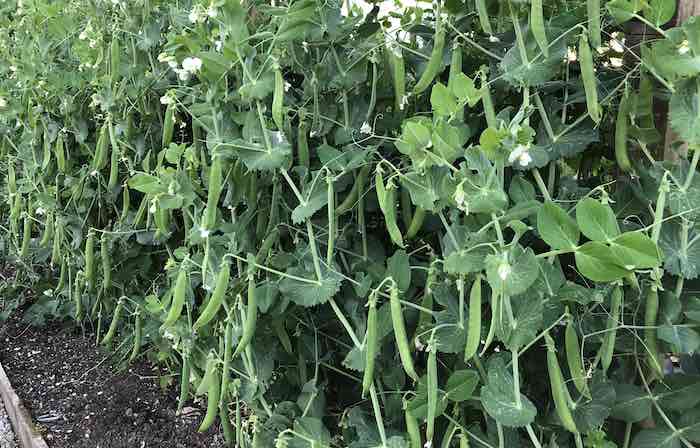
Peas are sown in March or April for relatively early summer harvests principally because peas will inevitably get downy mildew in late summer. Peas will germinate at low temperatures and will tolerate cold spring weather so are sown in March or April. Peas are ready to pick around 3 months after sowing with mange tout varieties (grown for their edible pods) a little earlier than varieties grown for podding.
Mange tout or sugarsnap varieties are best picked relatively early while the pods are still tender while peas for podding are harvested as you like them. The first small peas are sweetest and become progressively more starchy as they mature towards large, fully mature 'marrowfat' peas.
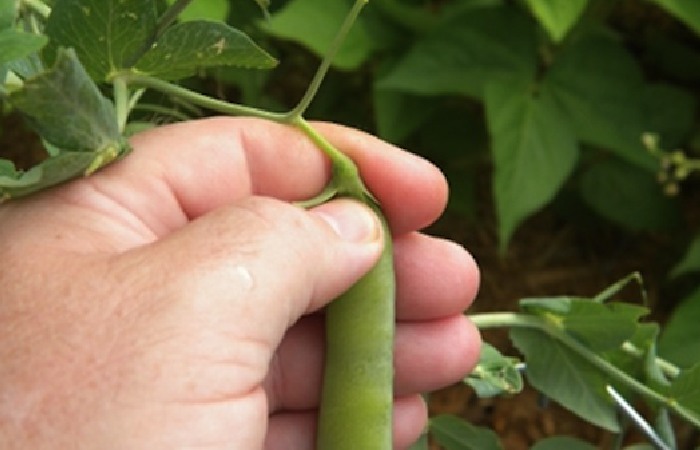
If pods are allowed to mature fully (where the pod is completely packed with large peas), the overall yield of the plant will be reduced as new pod production will stop and the plant will die back. This is because once mature peas (seeds as far as the plant is concerned) have been produced, the plant deems it's mission complete whereas if you keep harvesting them, it will keep trying to make more.
Pea vines are easily damaged when picking so it is best to hold the vine with one hand while removing the pea with the other or use a scissors to snip them off. There is also an 'expert' one handed method which is very satisfying once you get the hang of it. Hold with the point where the calyx (Peter Pan's hat) meets the pod between two fingers and push between your fingers with your thumb (above).
Potato
Harvest June - October
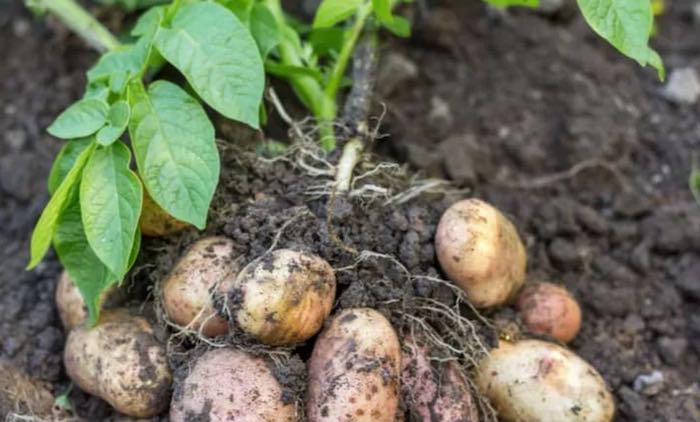
The main distinction to make with potatoes when we are talking about harvesting is between early and maincrop varieties. There are sub groups including first and second earlies or early and late maincrops but in general early varieties are harvested in June while maincrops are ready in August or September.
The main issue you have to work around when growing potatoes is blight, a fungal disease which attacks both the foliage and the tubers. Early varieties are susceptible to blight but have the advantage of being harvested before the disease hits in July.
View 'Solist' First Early Seed Potatoes 2023
Early Varieties - I have seen it advised that potatoes should be harvested after the plants flower but not all varieties produce a flower (particularly first earlies) so it isn't a reliable indicator. The most reliable method is to dig around the base of one of your plants in late May and have a look. Remember that early or 'new' potatoes are smaller than maincrop varieties so don't expect big bruisers.
As long as there are no signs of blight on the leaves, you can harvest early potatoes as you need them for that fresh new potato flavour.
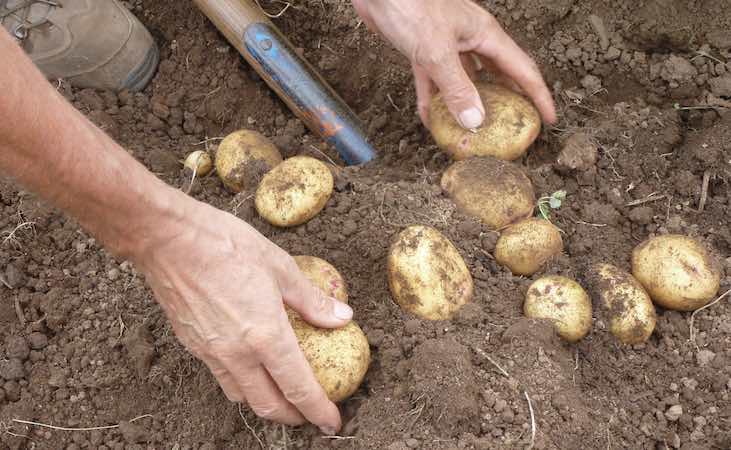
Maincrop Varieties - Unless you are spraying your crop to prevent blight I am not sure if you will ever get to the point of full maturity for maincrop potatoes, I don't anyway. The reason is that once blight hits you will only have a couple of weeks removing infected leaves (to slow the spread) until you have to remove all the foliage right down to soil level. This prevents blight spores infecting the potatoes below the ground but also halts the growth of the tubers. If cutting the foliage has been necessary, it is best to leave the potatoes undisturbed for at least 2 weeks to ensure any blight spores on the soil surface have died off.
If you are spraying or are lucky enough to have avoided the disease, you will notice the leaves of second early and maincrop potatoes begin to yellow when the tubers approach maturity in August or September (after the flowers if it's a flowering variety).
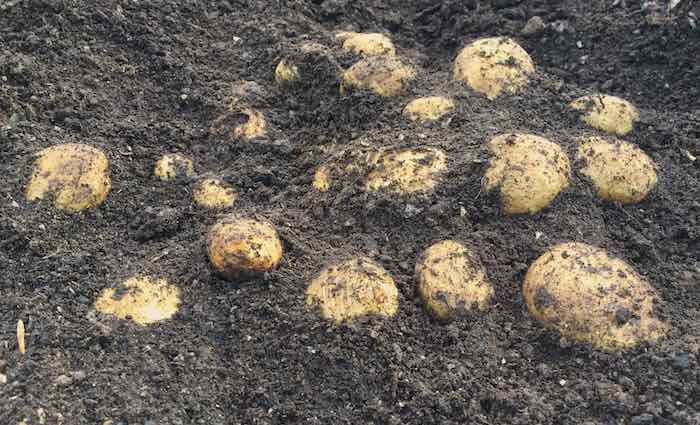
To dig potatoes, use a potato fork if you have one (they have blunt, round end tines) to avoid spearing your crop or gently root around with a spade. These days I prefer to shallow plant potato tubers under layers of compost or seaweed which makes them much easier to harvest. Above is a 'nest' of second early 'Orla' after removing the seaweed and brushing back a layer of compost, they just needed to be picked out with minimal disturbance to the surrounding soil.
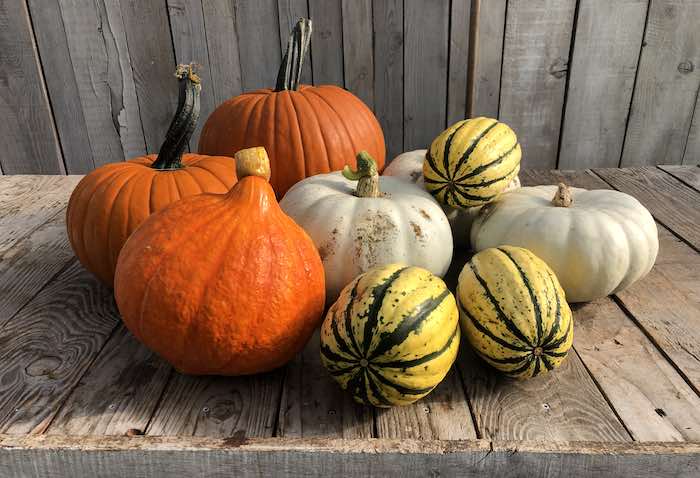
Pumpkin & Squash
When we refer to squash, most people think of hard skinned winter squash (e.g. butternut squash) but we also have softer skinned summer squashes which have a similar texture and flavour to a courgette (technically a courgette is a summer squash). I guess we better divide the two as they have different harvesting times and storage characteristics.
Summer squash
Harvest July - October
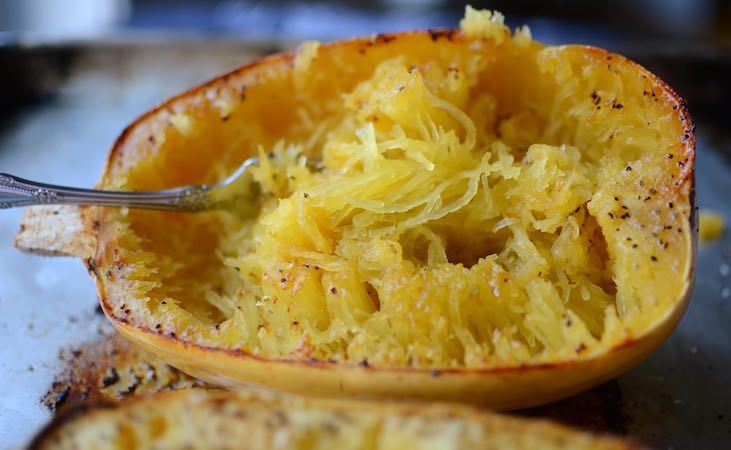
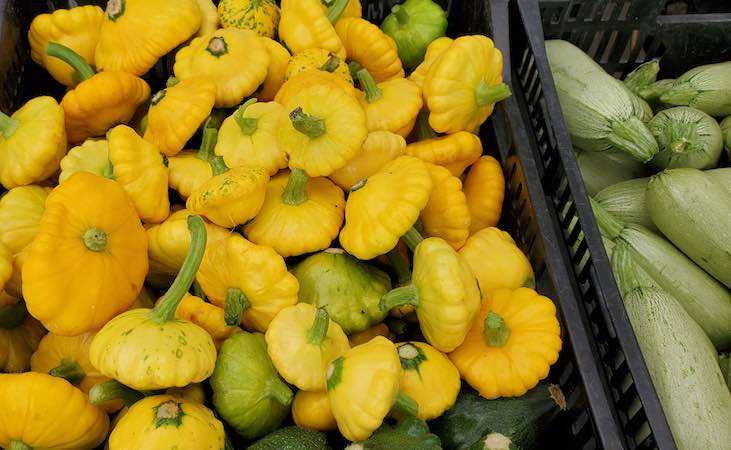
As we said, a courgette is a summer squash variety which we are all familiar with but there are a number of other options including flying saucer shaped 'Pattypan' or yellow 'Crookneck' with a bulbous belly and a slender neck. 'Vegetable spaghetti' (above) is also a summer squash which, when cooked and scooped out, gives a plate of marrow flavoured fibres which look a bit like spaghetti (if you squint your eyes).
Summer squashes are sown in May or early June and are harvested from July to October. Plants are generally more prolific than winter squashes and will produce large numbers of fruit from a single, bushy plant. Harvest time is up to your personal taste (smaller squash are sweeter and more firm), you will have plenty of chances to try different stages of maturity because the plants are so productive.
As with courgettes, the first couple of fruits are poor because the plant hasn't yet grown a root system large enough to support decent ones, they are best removed and composted. Summer squash grow so quickly in warm weather that you may need to harvest every second day to keep the fruits at a manageable size.
To pick, it is better to cut the joining stem with a knife rather than breaking them off as the latter can damage the main stem and lead to rot.
Winter squash (including pumpkin)
Harvest September - November
Winter squashes are sown in May when all risk of frost has passed and are ready for harvest from September up to the end of October depending on the variety you are growing. When fully mature, their hard skins enable them to store over winter in warm and dry conditions (in your kitchen).
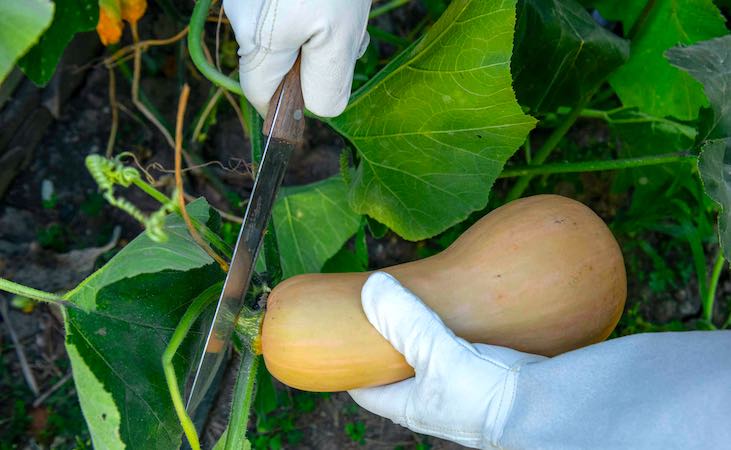
To judge when they are ready to harvest, keep an eye on the joining stalk which will harden and shrink a little, the leaves will also turn from deep green to yellow. You will also notice a difference in the sound if you tap the fruit which sounds more hollow when mature. Avoid breaking the stalk from the fruit if you want them for storage otherwise they will rot from the top down. The stalk can be difficult to cut without it snapping off as it gets very hard, it is easier to cut the main vine either side of the stalk.
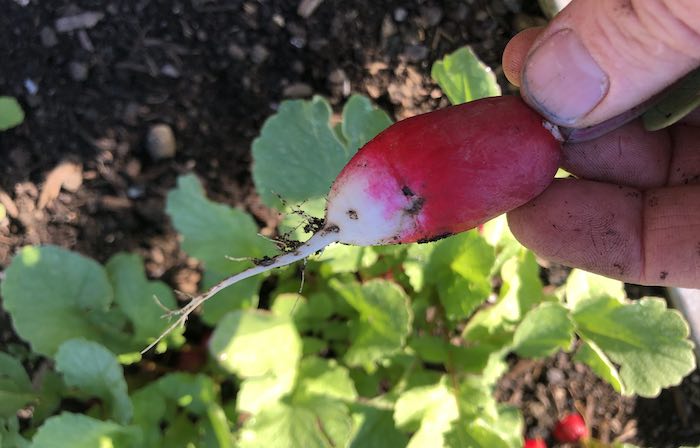
Radish Harvest
September - November
Other than cress, radish is probably the vegetable that almost everyone has grown (having done so in primary school), they are also one of the quickest with summer radishes being ready 6 or 7 weeks after sowing. Larger winter radishes and Oriental Mooli or Diakon also add a lot of variety to this often overlooked and underrated vegetable.
Summer Radish
Traditional summer radishes like 'Cherry belle' or 'French breakfast' can be sown from March up to August for harvests 6 weeks later. Just remember that because radishes are such fast growers, they also pass their best quickly. They should be picked young and fresh as they go woody quickly; sowing small batches regularly gives the a steady supply of perfect roots. To harvest, just pull them up.
Winter Radish
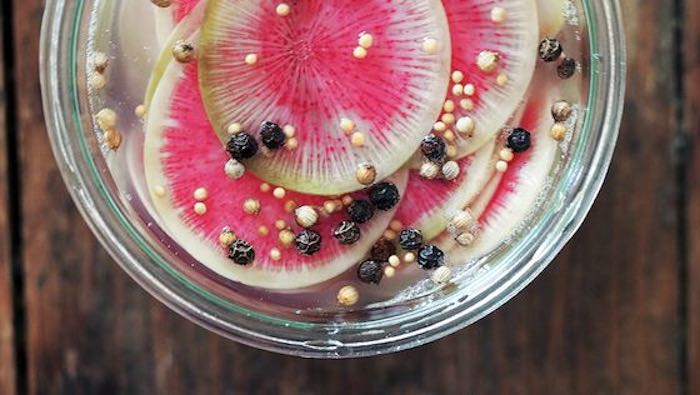
Winter radishes are larger than summer types, they take longer to mature (12 weeks +) but can be stored in the same way you would turnip or beetroot until needed. Sowing is from late July to the end of August for harvesting from October to November. Provided you don't have very cold winters, they will also sit in the soil for a long time without deteriorating so can be lifted when needed. For me, the principal attraction of winter radishes is using them to make a radish pickle (that is the beautiful winter 'Watermelon' variety above) which adds delicious tart flavours to a salad, I think it's time to give radishes a second look!
Spring Onion
Harvest April - November
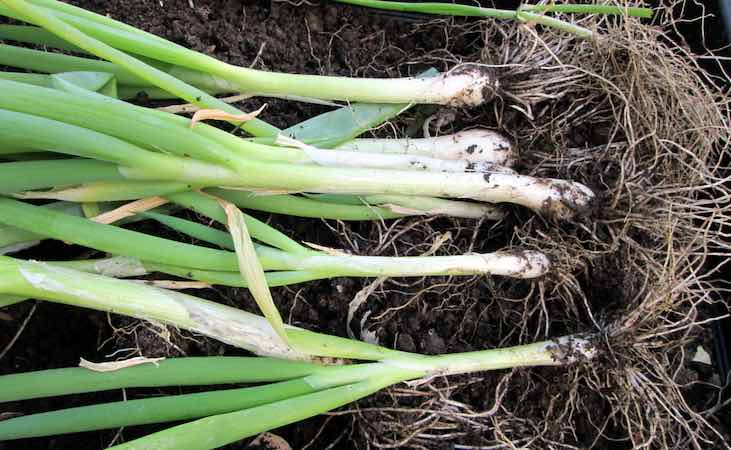
Spring onions or scallions have a long sowing period from January (with heat undercover) right through to early September with the first harvests coming in from June onwards. Spring onions can also be overwintered to give harvests from the following March, these are often the best quality as they mature before the fungal disease downy mildew is about.
Spring onions are best multisown (8-10 seeds in a single modular tray cell) and planted out in one bunch. Obviously the resulting onions grow in a clump which can be harvested all at once by slicing below with a trowel to sever the roots. Harvest time will be 12-16 weeks after sowing depending on the the time of year they went in.
Spinach Annual & Perpetual
Harvest April - November
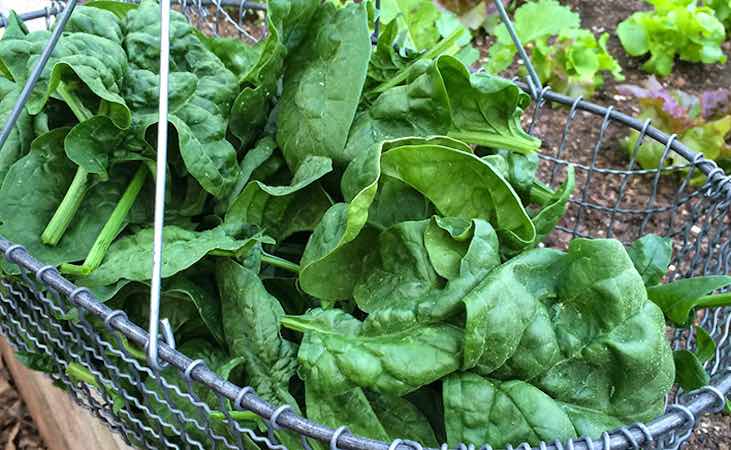
There are two types of spinach, annual or 'true' spinach *(above) or perpetual spinach which is more closely related to beetroot or chard. The harvesting methods are different as annual spinach is relatively short lived while perpetual spinach will give a long harvest period from a single plant.
It is a matter of taste I guess but personally I prefer the more tender leaves of annual spinach, especially when harvested as a baby leaf. Perpetual spinach has a big advantage however, especially if you are short of space, as a few plants will give leaves for up to 10 months including as early as April from overwintered plants.
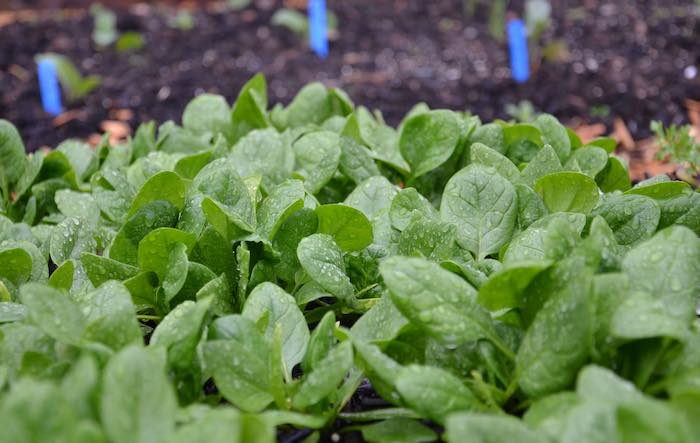
Annual Spinach
Annual spinach is sown from March to August with the later sowings giving a longer harvest window as spring sown crops are likely to run to seed in summer. The harvest period for summer grown crops is about 6-8 weeks but those sown in July or August give twice that as they will survive frost and run through winter and provide leaves the following spring. The first flush of growth in Spring is highly prized as leaves are sweet after cold weather. I have had great success with spinach in the polytunnel as growth starts again in mid February while cold nights give deliciously sweet leaves.
Annual spinach works well as a 'cut and come vegetable' by picking the lower, outer leaves in that same way you would lettuce (make sure 5 or 6 leaves remain in the centre of the plant). For baby leaf production the plants are cut across the top and will produce one more harvest, two if you are lucky.
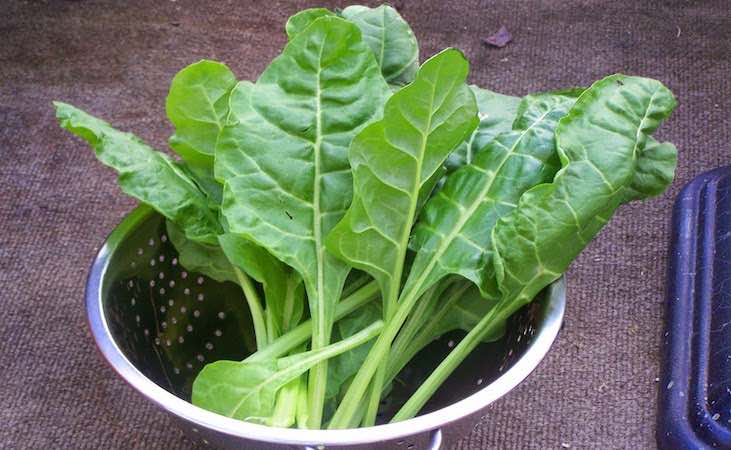
Perpetual Spinach
Perpetual spinach is a tougher plant with a big root system that can support a large plant and regular harvests, as we said, up to 10 months. The picking method is the same as for chard as follows:
Pick in the same way as you would rhubarb, by grasping the base of the leaf stalk and pushing down with a bit of a twisting motion. Cutting will do the same job but isn't ideal if you want to keep your plants going for a long season, this is because the remaining stump can rot and introduce disease.
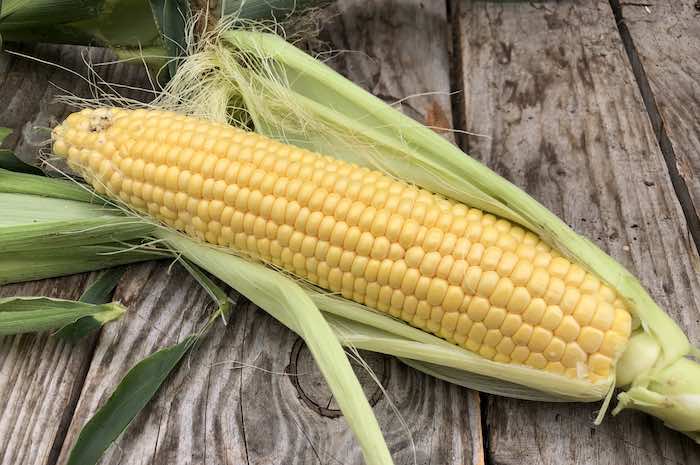
Sweetcorn
Harvest late July to early October
Sweetcorn is sown in May and June for harvests from July until early October. My garden is a little cool for sweetcorn and gives patchy results so I grow them in the polytunnel which gives me a 100% success rate and allows an April sowing and an earlier crop. The cobs of homegrown sweetcorn are astonishingly sweet and are completely different from anything you will get in the shops so it's a crop I would highly recommend.
Sweetcorn is ready to harvest from 10 weeks or so after sowing depending on the weather, the tell tale sign being the silks (the tassels coming out the top of the cob) turning dark brown. If growing outdoors, you need to be on your toes as cobs will also be attractive to birds and mice, I haven't had an issue in the tunnel but that might be just luck.
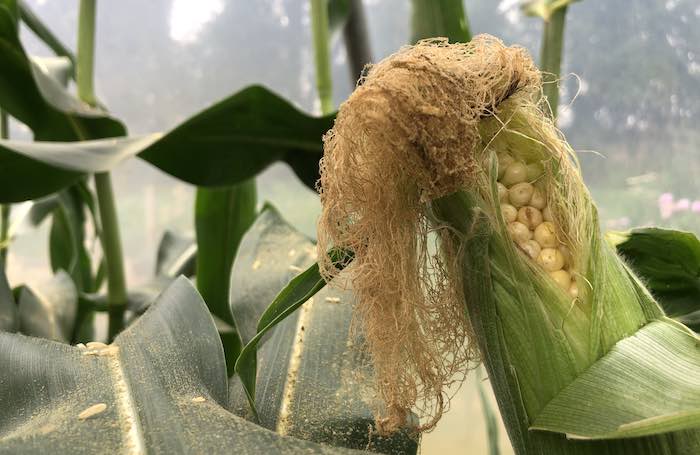
Once the silks are brown, you can test readiness by peeling back a portion of the sheath and puncturing a kernel with your nail. If the juice is clear wait, if it's milky the corn is ready to pick. You also have a choice depending on your preference, the first plump lighter yellow cobs are sweet while pickings 3 or 4 weeks later yield deep yellow kernels which are more chewy and less sweet. Don't be fooled into thinking light yellow cobs aren't ready, they will turn the characteristic bright yellow when cooked.
To harvest, you can either grasp the corn and push downwards to snap off or cut with a secateurs which I find easier than wrestling with the plant. Unless you intend to harvest the smaller secondary cobs (which aren't really worth it), it doesn't matter if the main stem is damaged as you'll be removing it anyway.
Tomato
Harvest late June to October
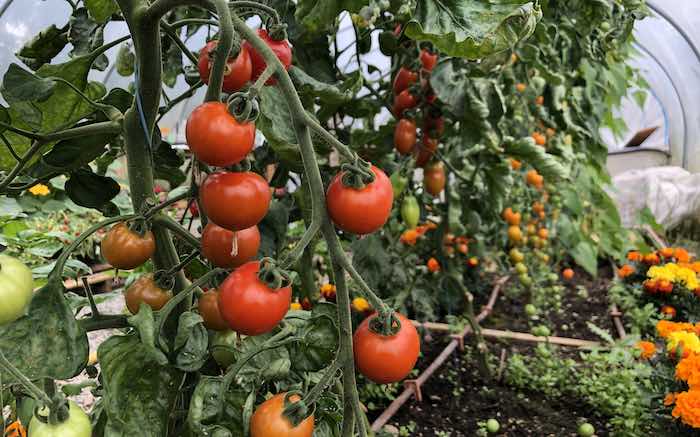
Tomatoes need a long season to ripen, the larger the tomato, the longer it takes to ripen so obviously cherry varieties are ready to pick before big beefsteaks. Sowing is in February and March undercover with heat for plants destined for the greenhouse or polytunnel and March and April if your local climate is warm enough to grow them outside.
The earliest indoor harvests will be in late June and early July for early cherries like 'Sungold F1' or 'Maskotka' but generally the harvesting period is from July through to the last frost. Tomato plants will keep producing more fruit if conditions are favourable until it gets too cold in late Autumn. Later produced fruits in September and October will struggle to ripen so it is a good idea to remove the growing tip from plants in early September (stopping), this is so the plant concentrates on ripening existing fruit rather than producing new ones.
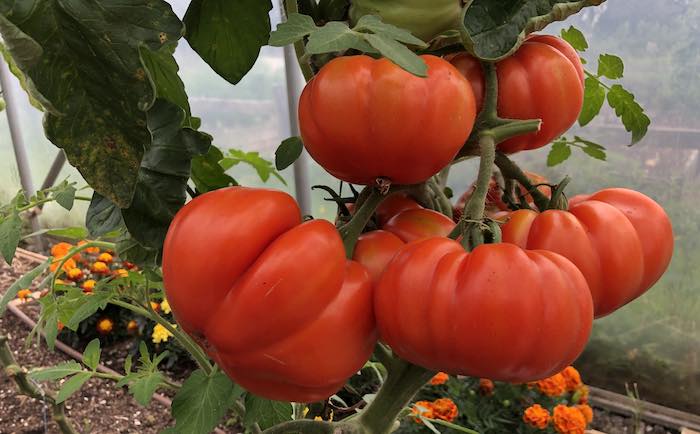
The point at which you harvest depends on how firm you like the flesh and how acidic you like the flavour. Harvesting earlier gives a firmer and more tangy fruit while leaving tomatoes on the vine to ripen further sees them soften and loose some of the sweet/acid balance. If you are new to tomato growing, be aware that not all varieties are the classic pillar box red, they may be yellow, orange, or purple so tasting fruit is a better judge of readiness than colour.
I also find that keeping tomatoes just a little on the dry side improves flavour if, like me, you prefer that intense tart tomato taste but this practice will lead to less tomatoes later in the season. Whatever your watering regime, keep it even as dry conditions followed by heavy watering cause fruit to split.
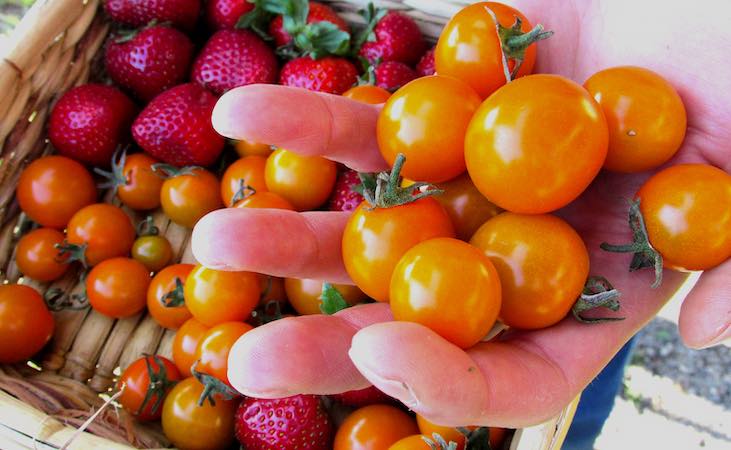
Tomatoes will be easy to pick when ripe as the joining stem (calyx) detaches easily. If you don't intend to use the fruit straight away, it is better to leave the calyx attached as the fruit will spoil quicker if removed.
As tomatoes ripen progressively from the base of the the truss (a truss is a bunch of tomatoes), it is unlikely that you will be able to harvest a full truss like the vine tomatoes you see in the shops. This is a good thing as shop bought vine tomatoes are harvested early to ripen in their packages which results in fruit that is less sweet, your individually harvested tomatoes will taste a lot better.
Turnip & Swede
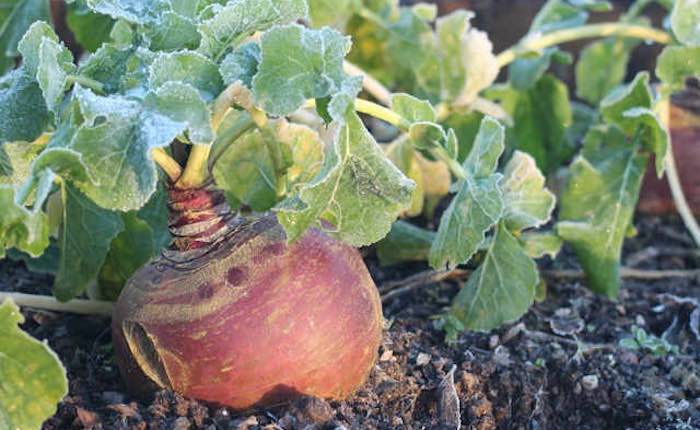
I am including turnip and swede together as, depending on where you live, a swede can be referred to as a turnip which can be confusing for some growers. A turnip is generally smaller than a swede and has white rather than yellow flesh. Turnips are harvested in May and June or in October and December but aren't generally grown in summer as they will likely run to seed and become woody in dry conditions. Swede (pictured above) are sown in June or early July and are the perfect winter crop for harvesting from September right through until the following April.
The advantage of turnips is that they grow quickly, especially varieties like 'Tokyo cross' so are a handy crop for August sowing to give a harvest before winter. Turnips don't have the same depth of flavour as swede, especially when swede has been exposed to cold temperatures over winter as, like other root vegetables, it converts starch to sugar as a cold survival mechanism.
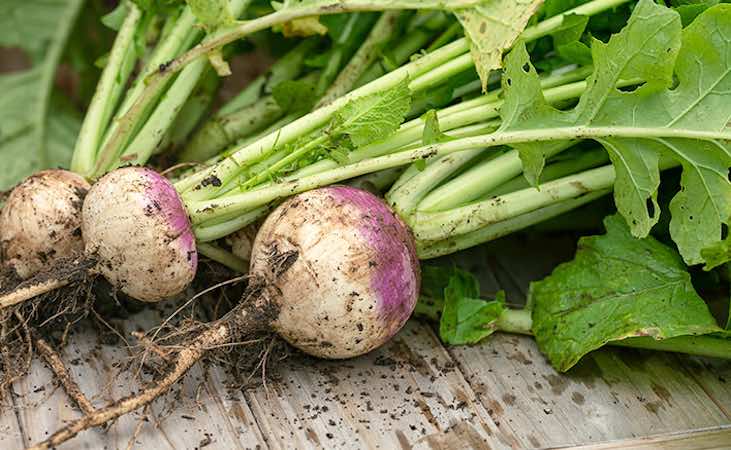
Turnips, like 'Milan purple top' (above) are generally ready 6-8 weeks after sowing. Spring sowings will mature quicker as the weather warms in May; you will need to be quick as they will run to seed in June. The size and shape varies depending on variety, some are flat so don't expect a ball but size wise you can harvest at around tennis ball size.
View Turnip 'Purple top milan'
Swede can grow much larger depending on how early you sow and can be harvested from September onwards. There is no rush on lifting them until the following spring when roots will get more fibrous as they begin the flowering process, I would aim to use the last of your swede by mid April.
To harvest both turnips and swede, loosen the soil below the root and pull.
