Sowing & growing tomatoes
OK, so here's the plan. I usually write a fresh monthly article every year on the Vegetable Garden in March (or whatever month it is) but some years are better than others depending on how much time I have and what is happening in the garden. The better solution (obviously) is to keep improving a single article so, after a few years, we have the definitive monthly guide with all sorts of information, photos and videos included in each one.
As luck would have it, last year's March article wasn't bad (though I say myself) so I am sharing it again this year and will add to it as the month goes on. Let me know what you want me to add to the monthly bulletins and I will be happy to oblige.

Sowing tomatoes and growing healthy tomato seedlings plants
I have briefly touched on tomatoes in the March monthly update above but I thought I would go into a little more detail here as they are one of the crops that almost everybody wants to grow.
In case you are new to vegetable growing, I feel I should point out that tomatoes need heat throughout their lifecycle, both to germinate and grow healthy seedlings and to produce ripe fruit. Growers with sheltered, southerly gardens in Ireland and the UK should be able to grow tomatoes outdoors but for those of us in cooler latitudes, they are a greenhouse or polytunnel crop.
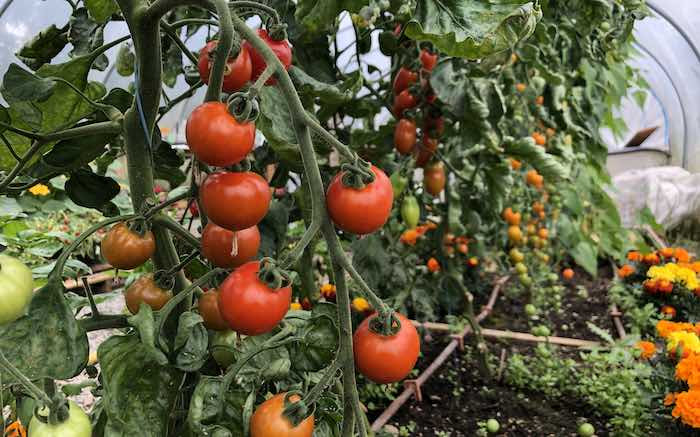
One of the tricky things about growing tomatoes is that, because they need as a long period of sunshine as possible, we need to start them off early in the year when conditions are less than ideal. Tomatoes need a soil (or more likely, compost) temperature of around 20˚C for the seeds to germinate so they will need to be sown in a centrally heated room (in pots or trays rather than directly into the carpet) or using a propagator or other heat source if sowing in an unheated greenhouse or polytunnel.
The difficult part is that, while we can easily supply the heat to germinate seeds and protect young plants from cold, it is more difficult to provide enough light to prevent them getting 'leggy' (tall and gangly with more stem than leaf). The earlier you sow, the more pronounced this problem will be because daylight hours and light intensity are low in February which is why, despite the advice on seed packs, I find it better to sow tomatoes from early to mid March.
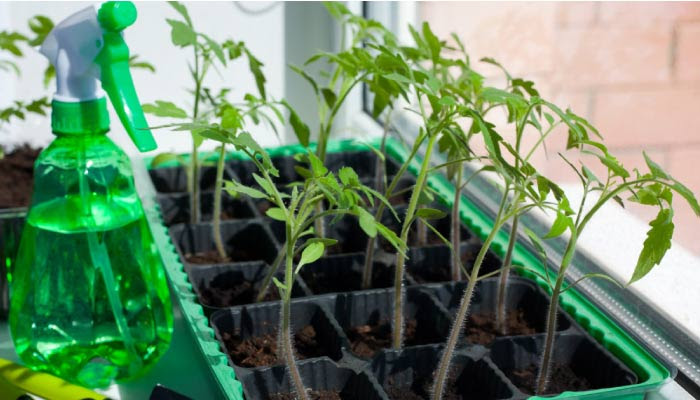
It is best to sow in pots or trays in a greenhouse or polytunnel to benefit from as much available light as possible but if sowing in your house is the only option, find the sunniest, south facing window that you can. It is also worth remembering that, although tomatoes need around 20˚C to germinate, the resulting seedlings will do better grown at a lower temperature of around 14˚C when light levels are low as the warmer it is, the leggier they will get (if there isn't enough light). If you have the option you can put plants in a bright but cooler place e.g. a porch or unheated room.
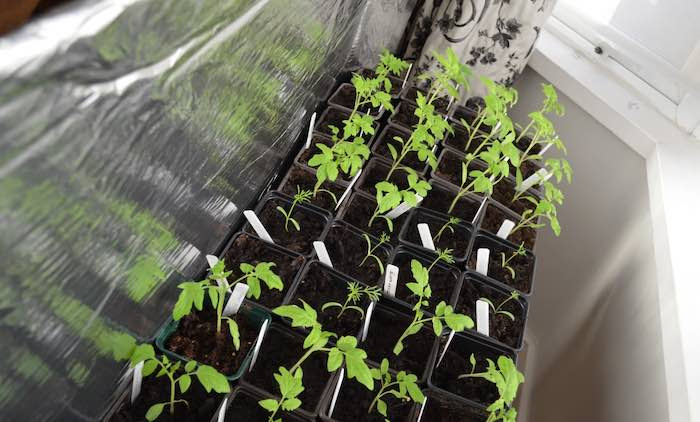
I think I mentioned this before but a plant growing indoors in a window will only receive about a third of the light available in an unshaded greenhouse or polytunnel. This is simply because the sun arcs across the sky so the sun will be behind your house for a significant part of the day. If you are growing on a windowsill with light only coming from one direction (a point on the compass, not the boy band), you can help things along by placing a foil backing behind your seedlings to reflect light back on the shaded side.
As you will see in a minute, tomato plants respond particularly well to deep planting (because new roots grow from buried stems) so house grown plants which have inevitably grown a bit lanky can be easily recovered, all I'm saying here is to give them as much light as you possibly can in your circumstances.
What to sow?
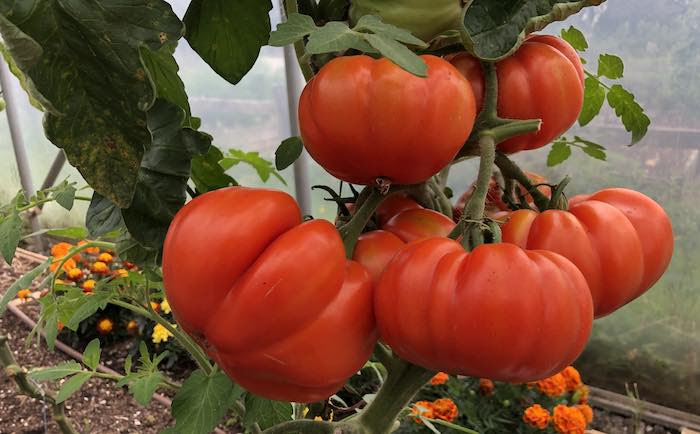
There are a huge range of tomato varieties available but, broadly speaking they can be split into cherry, paste or plum, slicing or beefsteak types. The smaller cherries have a higher sugar content so are sweeter while the plum or paste types have more dense flesh so are well suited to cooking. Slicing tomatoes are your normal medium sized tomato you see in the shops while the beefsteaks (above) are the big bruisers you see fraternising with mozzarella cheese and basil in Italian restaurants.
Which you choose is largely up to your personal taste although I would make the point that the smaller the tomato, the quicker it ripens. This is especially relevant if you are thinking of growing outdoors as it is unlikely you will get a long enough period of heat for a large beefsteak to ripen while a cherry variety should be no problem.
Habit
When we look at how any plant grows, whether it is tall and open or short and stocky, we refer to this as ‘habit’. Tomato plants have two main habits, they either grow long vines or have a more compact bush shape.
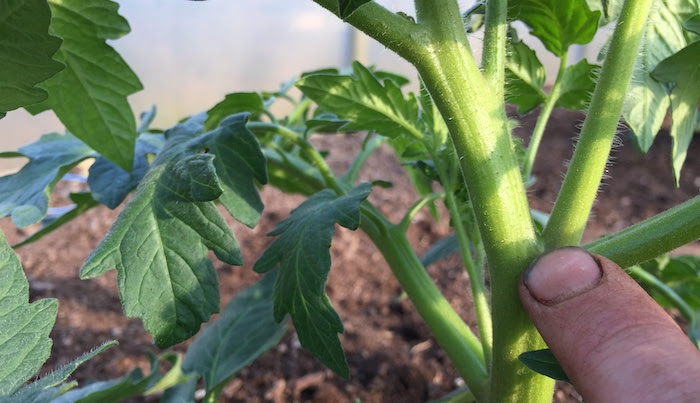
Vine tomatoes are referred to as indeterminate or cordon types. They are the varieties we train up poles or twine, either outdoors or in a greenhouse. Vine tomatoes need their side shoots (the one my grubby finger is pointing to) pruned out regularly to maintain a single stem otherwise they will grow into large unruly plants at the expense of fruit production.
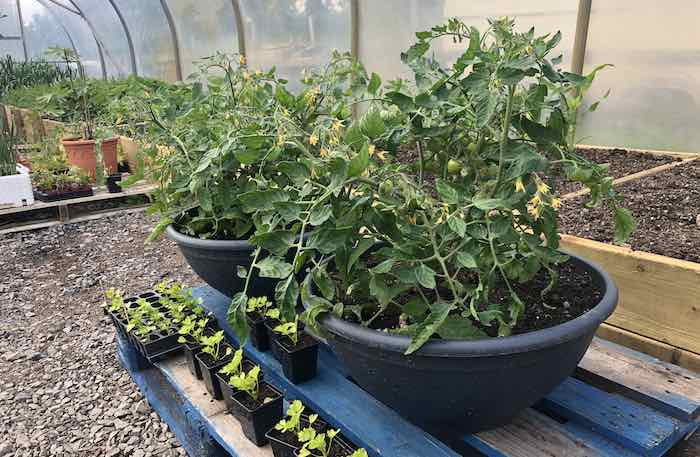
Bush tomatoes are known as determinate or bush varieties. They don’t need training or support as they grow in a compact or determinate bush shape and do not need to have their side shoots removed.
A bush variety, especially dwarf bush varieties, are good for windowsill growing, hanging baskets, containers or anywhere where space is an issue. You will also find them useful if you are using a mini tunnel or cloche system and don't have the height for a tall cordon type. Don't be fooled by the size of a bush tomato, the right variety (e.g. 'Maskotka' above), well grown will produce surprisingly heavy yields from a small space.
The vast majority of tomatoes are cordon varieties but do check the seed pack to make sure because the care of cordon or bush types is so different.
Sowing Tomatoes
Despite all my fuss about light and temperature, tomatoes are actually extremely vigourous plants and are really very easy to grow. Unless you do a truly awful job, you will more than likely be eating some delicious homegrown tomatoes. On the other hand, the best growing conditions produce the best fruit and the highest yields; all the little things add up so it pays to get good at each part of the process. Also, cordon tomato plants take up a lot of real estate in a polytunnel or greenhouse for the whole summer so you might as well grow the highest yielding plant that you can.
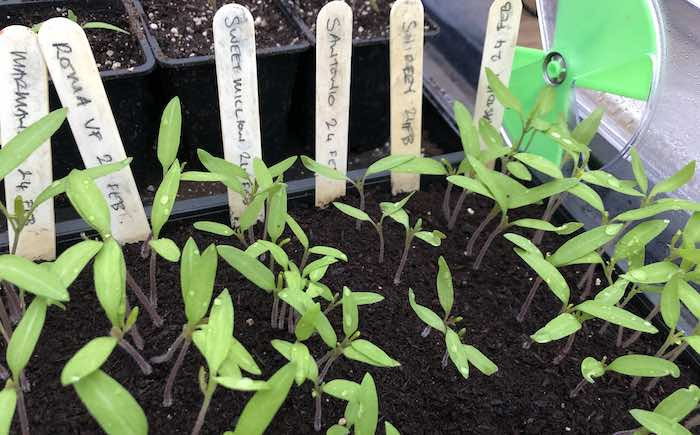
For that reason, I usually produce twice the number of plants that I need and only plant the very best in their final positions in May. This 'survival of the fittest' process starts at the seed sowing stage where I sow all my seeds together in a seed tray and pick the strongest plants to prick out and pot on. I know I mentioned this a couple of weeks ago but seeds sown in close proximity tend to germinate better, are less likely to suffer from overwatering and they take up less space in a propagator.
Pricking out and potting on
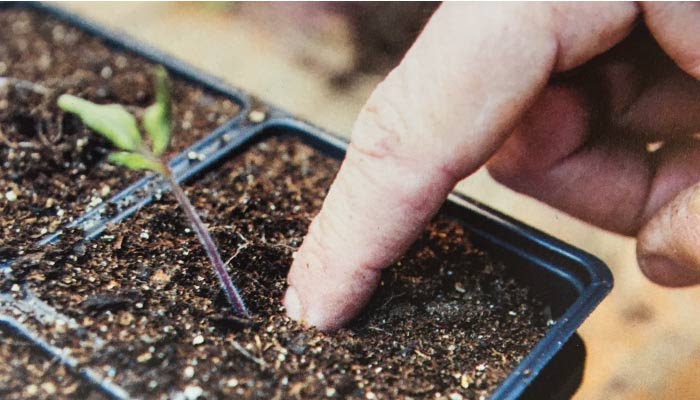
Pricking out basically means gently removing young seedlings with their roots intact and transplanting them in a new tray or pot where they have fresh, nutrient rich compost and more room to grow. Research has shown that pricking out as early as possible will produce better plants, the earliest is probably a week after germinating when they are about an inch or so tall.
To transplant, loosen the compost below the root and tease the seedling out. You will see a significant difference in the size of the roots between one plant and the next, obviously take the seedlings with the largest root system.
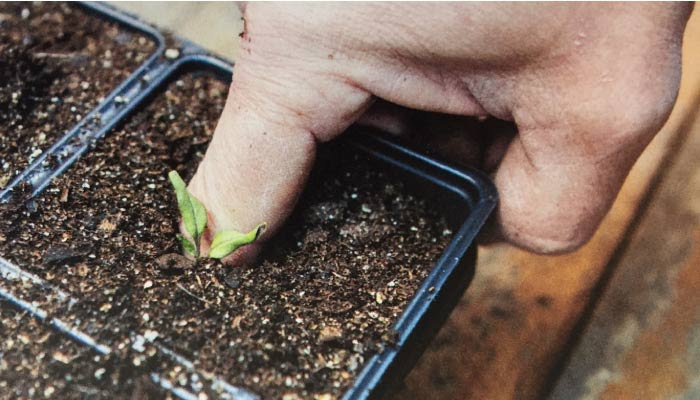
Make a hole in the compost the depth of the root and stem so that only the leaves and a few millimetres of stem show above the surface of the compost. As we said earlier, the tomato seedling will produce new roots from the sides of the buried stem so should produce a more extensive root.
Once planted, remember our mail on watering 2 weeks ago, be careful not to over water when the seedlings are still very small, it is better to err on the dry side rather than overdo it. As the plants grow, and can suck up more moisture, you can increase your watering accordingly. Get into the habit of lifting a few pots or trays before and after watering so you can get used to the weight of wet and dry compost, it is the quickest way to guage whether plants need water.
And finally.....
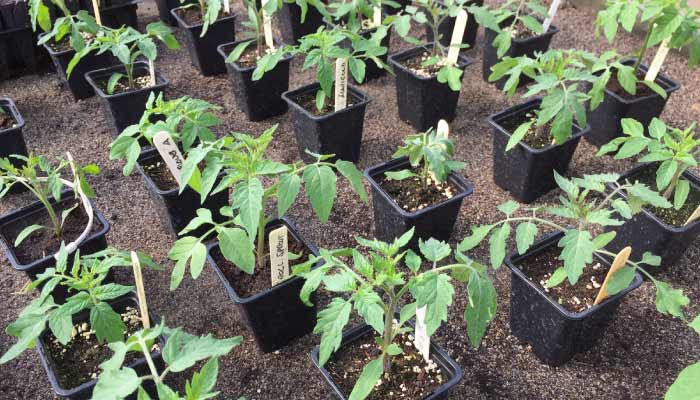
If your freshly potted plants are in a greenhouse or polytunnel rather than in the house, they will need to be protected from cold, especially at night. The pots or trays will need to stay on the propagator or heat bench but at the lower heat of approx 14˚C. The image above is of my plants last year doing nicely on a heat bench, on most days I left them uncovered but placed a layer of fleece over them at night both to protect from frost and to help reduce the running costs of the heat cable buried under the sand.
You may also notice that the individual tomato plants are spaced out on the bench. This is so they are not competing with each other for light and allows me to grow nice stocky plants. To be fair, this is a bit of a luxury as I have a large heat bench, if this is not possible for you, it's not essential as you can use the deep planting trick again when you either pot on to a larger pot or plant your tomatoes in their final positions.
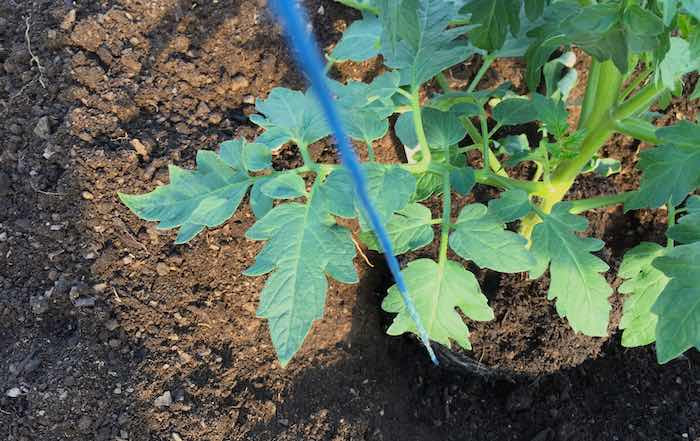
I will keep you updated on the next stages of tomato growing as we move through the season and will be able to share the first batch of our new Quickcrop videos (including tomatoes) the week after next. You will need to wait until early May to plant tomatoes in their final positions in the polytunnel, later if planting outside so we have a bit to go yet. If you'd like to jump the gun and read on about planting tomatoes, you can read my post on the 5th of May last year, 'Planting Tomatoes & Chillis in the Polytunnel'
Quickcrop Vegetable Seedlings
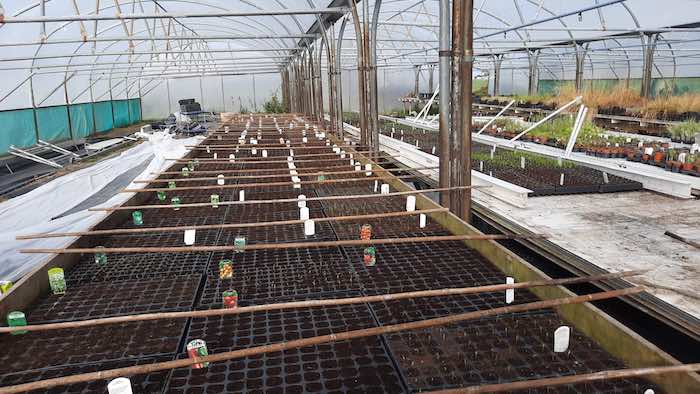
As you can see above, 'Operation Germination' is well and truly underway in our polytunnels with 1000's of seeds sown and plenty of new shoots peeping out above the surface of the compost. Jack has had a difficult job for the past two years in keeping up with demand but we expect this year to be easier as he has increased capacity.
What I am trying to say here is that we experienced significant delays (apologies again) getting plants out in 2020 and 2021 but that will not be happening again this year. We have a full range of seedlings available to order now and will be shipping by mid April to ensure everyone gets their plants in plenty of time.
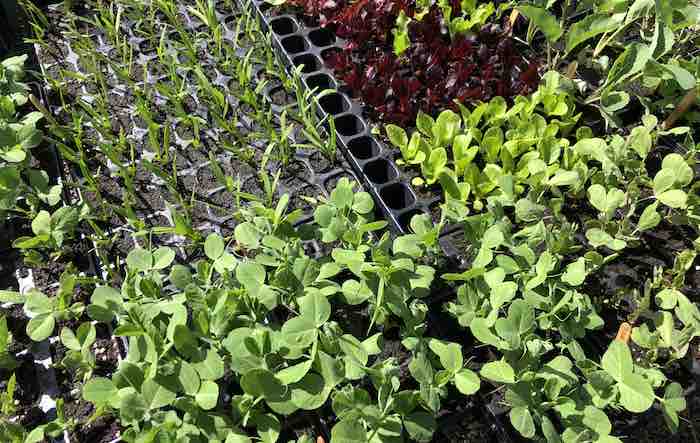
The time at which we can plant seedlings outside will depend on the weather, it is usually the end of April or early May but, as you know from last year, this can change with last season being unusually cold. With this in mind, I will be writing an information sheet on how to keep seedlings in good condition if conditions outside aren't suitable to put them out.
There are a number of things you can do depending on the plant including potting on to a larger pot or planting out under horticultural fleece. These skills are worth learning whether you are buying in seedlings or growing them yourself as it is often the case that planting will be delayed by the weather. I will be covering seedling care in our mailer for the 2nd week in April and will provide a link to anyone who has ordered seedlings to make sure you get the best out of your plants.

Bare Root Hedging
We are now inching closer to the end of the bare root planting season as dormant plants begin to bud and growth takes off for another year. If you have been thinking of planting a hedge, early March is an ideal time to do it as the soil will likely have dried a little and plants will start to take off towards the end of the month. We still have an almost complete range including Blackthorn, Common Beech, Yellow and Red Dogwood, Griselinia, Hawthorn, Laurel, Hornbeam, Privet and Guelder Rose.

We also stock a red, white and pink (above) cottage garden dog rose in our hedging section which can be used to create an informal flowering hedge. As I did a couple of years ago, a dog rose can also be planted through an existing hedge to add colour and interest for both us and pollinating insects. I brightened up and filled out a scruffy whitethorn hedge in this way and it looks a whole lot better when the rose is in flower.
A couple of quick tips on planting hedging are as follows:
- Clear out any perennial weeds before planting.
- A weed block mat is very helpful to control weeds while the hedge is getting established.
- Mix a little blood, fish and bone into the planting hole to encourage healthy root growth.
- A protective windbreak mesh will make a huge difference to how quickly the hedge fills out in exposed areas.

Incredible Edibles Campaign
We are very proud to have been involved with the 'Incredible Edibles' schools campaign again this year with 1800 kits winging their way to schools all over the country as I type. We have had a hand in designing, filling and shipping the boxes that you see below in our warehouse before they were dispatched on Monday and Tuesday.The aim of the project is simple:
- Educate students about growing fruit and vegetables.
- Increase awareness of food origin, identifying and supporting Irish grown produce, while looking after the environment.
- Highlight the importance of consuming 5-7 fruit and vegetables daily for a healthy balanced diet.

Thanks to everyone who registered and helped spread the word earlier this year and a big thanks to all the sponsors of the project including Healthy Ireland, The Department of Health, The Department of Education, Bord Bia, The Department of Agriculture, Dole Fruit, Safefood, Country Crest, McCormack Family Farms, IFA, Keelings, teagsc, INDI and IPM.
Here's to the gardeners of tomorrow!
OK, that's it for today, I hope some of the above was helpful and relevant in your garden. Next week we will be talking about preparing the garden for planting when the weather allows and looking at what plant feeds suit specific crops.
See you all next week!

Andrew
