How To Fix a Hole in a Polytunnel

Polytunnels are designed to be durable structures, and you can expect the polythene cover itself to last for a good 4-5 years before it needs replacing. Having said that, accidents can happen. Falling tree branches, birds or wanton child vandalism can cause small holes or tears in the polythene.
It’s no reason to panic, as this kind of damage is repairable. However, speed is of the essence if you don’t want a small hole to grow into something much larger. Windy conditions can potentially worsen any tears in the polythene.

Polytunnel Repair Tape Rolls
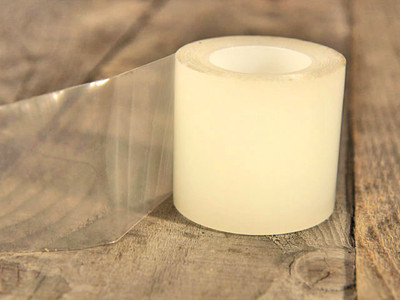
View ProductOne item that the polytunnel gardener should always have lying around somewhere is Polytunnel Repair Tape Roll. It’s recommended to use tape designed with polytunnels in mind: it will be far superior to duct tape, masking tape or whatever else you might be tempted to use.
These kinds of tapes are frequently transparent in design, UV resistant and often very strong - indeed some can outlast the polythene itself once they’ve been affixed to the cover.
Before you patch up the hole or tear, you should ensure that the surrounding area is clean and dry. Use a cloth or soft-bristled brush and soapy water, and follow this up by patting down the area with kitchen towel. Leave the area to air dry for a while to make extra sure. This will help strengthen the adhesion and ensure that the tape doesn’t start peeling away at the edges.
How much tape you need will of course depend on what size the hole is, but you want to have about 2 inches of overlap past the edges.

Start on the outside of the tunnel first, and place the tape carefully over the tear. Watch out for any air bubbles, as these can draw in moisture. If you see any, flatten them out towards the edges. Add a second layer of tape for extra piece of mind.
When the tape has been fully affixed, smooth over the area gently. Repeat this process on the inside cover. It’s helpful if you have an extra pair of hands here, to apply pressure to the outside as you work on the inside. For holes that are higher or harder to reach, you may need a stepladder and someone to hold it steady.

Polytunnel Pest Control
View Related ArticleIf the hole is somewhat larger, you may need to extend out further from the edges with the tape - and of course use more! Polytunnel repair tape can be replaced for a lot cheaper than the polytunnel cover, so use plenty of it so long as it’s not overkill.
Keep an eye on your polytunnel regularly and inspect for any damage. It’s a good idea to do this after any spells of windy or stormy weather. When it comes to maintenance of your polytunnel cover, it’s vitally important to catch any damage as early as possible and nip it in the bud. Your wallet will be thanking you in the long term!


