
Choosing the Right Polytunnel for Your Garden

A polytunnel is a game-changer for the home grower, and if you can afford the initial investment it will pay off in spades. However, trying to choose between the range of options (and ensuring you get the best long-term value) can cause a bit of head-scratching.
What Size Polytunnel Do I Need?
This is usually one of the first questions you’ll ask yourself, and with good reason. Of course, a more compact tunnel will cost you less, but it may also be more suitable for smaller suburban growing spaces.

Allotment Polytunnel (2.4m Wide)
View ProductYou obviously don’t want a polytunnel taking up every square inch of space in your back garden (even if it seems to rain constantly outdoors); aside from anything else this can cause issues with tree or hedge roots encroaching into the polytunnel’s space and competing for nutrients.
On the other hand, it’s very easy to underestimate how much space you’ll want once things get going. With a few initial successes under your belt, you can quickly find yourself longing for more room - especially at the business end of the growing season.

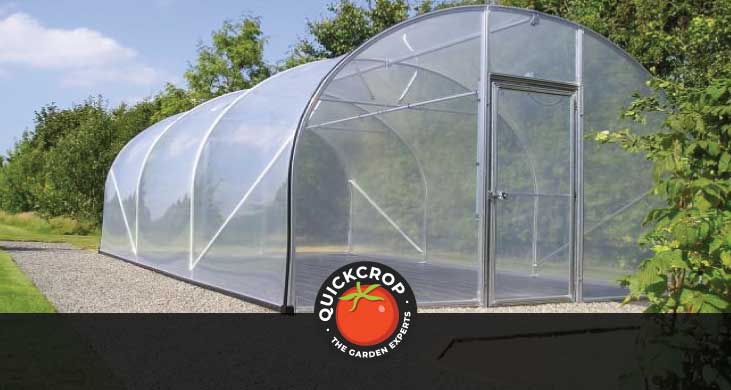
Even a spacious polytunnel set-up can quickly fill with plants, tools, raised beds or compost bags; you may also want some seating for when your back needs a breather.
The polytunnels we supply at Quickcrop come in a range of widths, from 2.4 metres (8ft, Allotment Polytunnel) to 5.5 m (18ft, Large Garden Tunnel). Within these fixed widths you then have a range of lengths that you can choose from. With the Large Garden Polytunnel for example, you can opt for between 8m and 18m.
We are confident that the options on our site cover the needs of most home growers; having said that, someone getting into commercial growing may well need a larger or longer structure.

Large Garden Polytunnel (5.5m Wide)
View ProductOur advice for the beginner to polytunnel growing is to go one size bigger than you think you’ll need. It’s rare for someone to wish they’d gone for a smaller structure.
Another thing you might be wondering about is height restrictions, or whether you need planning permission. This blog post has more info, but generally non-commercial garden polytunnels should be no higher than 3 metres in order to be exempt from needing planning permission.
The Importance of the Polytunnel Frame
When it comes to durability and longevity, the most crucial part of the polytunnel is the frame. A polythene cover can be replaced in the worst case scenario, but failure of the frame would be a more costly problem.
Galvanised steel is the industry standard for constructing a polytunnel frame, due to its strength and resistance to corrosion. The hoops or pipes which make up the frame should have a substantial ‘wall thickness’ in order to withstand gale force winds etc. This is even more important than ever now that winter storms have become a regular event.

Another important aspect of the polytunnel frame is its shape. The characteristic ‘curving’ polytunnel isn’t just an aesthetic choice: the curve actually enhances the structure’s sturdiness and wind resistance.
Having said that, ‘straight sided’ polytunnels are sometimes favoured because the idea is that they offer you more head room for working along the sides of the tunnel. Some polytunnels can offer a combination of the two, with straight sides that transition into a curve, allowing for the best of both worlds.

Should I Add Crop Bars to my Polytunnel?
Crop bars (or crop supports) are horizontal bars that are attached to the tunnel hoops on the inside of the tunnel. They are fixed above head height and are most commonly used to hold support lines for tall-growing crops like tomatoes, cucumbers or climbing beans.
Wire or light rope can be fixed from one crop bar to another, offering plant support along the full length of the tunnel. While you can do without crop bars, they significantly increase the range of crops you can grow, leading to more productive and abundant harvests.
Crop bars can also add extra structural support and stability in the event of challenging weather conditions or in exposed locations.

Polythene Cover
While the frame quality is of vital importance, it is the polythene cover that holds the key to how a polytunnel functions. This material traps heat and warmth from the sun, fostering an inner climate that is warmer than outdoor temperatures - and more conducive to growing warm-climate crops such as tomatoes, peppers and cucumber.
Any polythene cover worth its salt will be UV-treated to prevent degradation. A good quality cover will also diffuse sunlight, meaning that the light entering the tunnel will be scattered evenly. This reduces the possibility of hot spots or of plants being shaded out. Heavy duty polythene - in the range of 700-800 gauge - is recommended for garden polytunnels.

Small Hobby Polytunnel (3.7m Wide)
View ProductThe polytunnels that we supply at Quickcrop have a light transmission level of 89%: this is an optimal level for photosynthesis and is at the upper end of the scale, with the max. level believed to be 94%. The material is 800 gauge (or 200 micron) polythene, with a thermic efficiency of approx. 85% - enhancing its ability to retain heat in cooler conditions.
Anti fog and anti-drip additives prevent buildup of condensation, maintaining a more stable growing environment. Excess condensation inside the tunnel can interfere with sunlight transmission or lead to problems with fungal disease.
How To Secure a Polytunnel to the Ground
Related ArticleAttaching the polythene cover is at least a 2-man job. The cover should be pulled taut over the frame; a tight, well-tensioned cover is far less likely to move or flap around in windy weather, and rainwater won't have an opportunity to pool in slack areas.
See below for further info on attaching the polytunnel cover (‘Base Rail Method vs Trench Rail’).
How Long Will a Polytunnel Cover Last?
You can expect that you will have to replace a polythene cover eventually. Some of this can come down to luck or how exposed your site is. However, a good quality polythene cover can last from 7-8 years.

When it comes to extending the lifespan of your polytunnel cover, there are some important things to keep in mind:
- Overhanging branches can be an issue, as in stormy weather they can break loose and possibly pierce the polythene.
- A small tear in the polythene is no cause for alarm, but you should act fast to prevent the hole or tear from becoming bigger. Specially-designed Polytunnel Repair Tape can have your cover as good as new, and it is a relatively quick DIY fix.
- ‘Anti Hot Spot Tape’ (included with the polytunnels we supply) is a protective adhesive foam that reduces wear and tear caused by friction against the steel frame. It is applied directly to the outer surface of the hoops where they are in direct contact with the polythene. The galvanised hoops can get hot in summer, but the tape will have an insulative protective effect.

Polytunnel Gardening
Related ArticleBase Rail vs. Trench Method
There are two commonly used techniques when it comes to fixing the polythene cover: utilising a base rail, or the more traditional method of burying the polythene edges in a trench.
Base Rail
This system uses timber or metal rails to fix and anchor the polythene. It’s more expensive up front, but it makes future adjustments or cover replacements far easier, as well as being less labour-intensive.
A base rail is more common with modern polytunnels. It makes for a quicker and easier install, and you have the benefit of being able to adjust the tension until the cover is drum tight.

Trench Method
Alternatively, the polythene cover can be attached by digging a trench on each side of the tunnel and burying the excess polythene in the ground, before covering with soil to hold it in place. A spade’s depth is recommended.
This is a cheaper method and very secure. Buried polythene can serve as a somewhat effective barrier against curious animals or slugs, as well as preventing weeds from creeping in (it’s worth noting that if you are using the base rail method, you can still bury any excess polythene to safeguard against draughts etc - but much less digging will be required).
However, one downside is that you will be cursing those trenches if you ever need to re-cover the tunnel. It can also be difficult to achieve just the right level of tightness with this method.

Think Ventilation!
Ventilation and airflow is another crucial thing to take into account when buying a polytunnel. Temperatures can soar in the summer months (or earlier), and once they creep above 30C your plants can become stressed, which may stunt growth or result in wilting and even death.
The standard recommendation for healthy airflow is to have a door at either end of your polytunnel. This should suffice for most garden polytunnels, although larger commercially-orientated tunnels can require some ventilation along the sides to avoid areas of ‘dead air’.

The door doesn’t have to be left fully open to provide ventilation. Depending on weather conditions, you can prop one door or both part way open, while many polytunnel door designs will encompass an upper panel of netting or mesh that allows for airflow when the door is closed.
In Conclusion
We hope this helps you to choose a polytunnel that suits your needs. We have taken all of the above factors into account when choosing the tunnels that we ourselves supply. Follow the link below to see our range of options, and contact us if you have any questions.