How to Make a Heat Bench Propagator Using a Soil Warming Cable
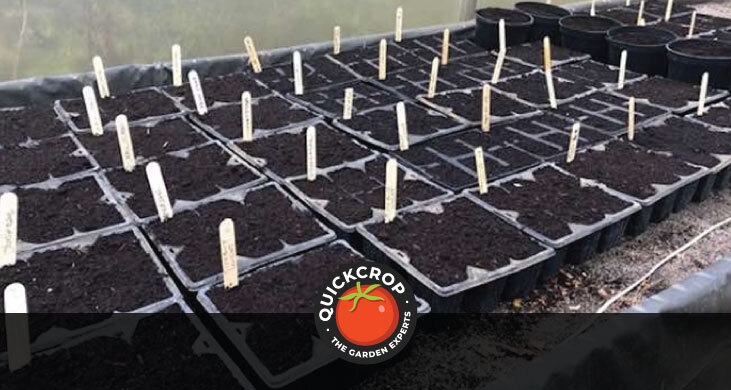
Here at Quickcrop HQ we propagate large amounts of vegetable seedlings in the early spring, so we need some heat to get them going. Clearly a heated propagator or heat mat isn't really practical when working on a large area. Instead we use lengths of soil warming cable - buried in sand - to provide the warmth we need for germination.
There's a little bit of work involved in setting up your DIY heat bench, but once it's in place it's simple to use and should last you for years.
What Materials Do You Need to Set Up a Heat Bench?
The idea here is to embed the cable evenly in a box of sand covering the area you want to heat. It's a bit like an electric blanket, but with sand instead of a blanket. We need to build a box at a convenient height strong enough to hold a decent quantity of damp sand as well as all your seed trays. Here's the list of stuff you need:
- A base for your bench. Old pallets or crates are handy.
- Sharp builders sand (available from your builders merchant).
- Foam insulation board.
- Heavy gauge waterproof polythene.
- 6 inch high planks for the sides
- Timber board for base
- Corner posts
- Screws or nails to hold it all together.

Soil Warming Cable - Biogreen - 6m, 10m 25m
View ProductN.B. If you know a friendly builder, they will always have odds and ends of insulation board and DPC plastic - it's worth a go! You could also ask builders suppliers if they have any damaged pieces.
Build Your Support
I'm being a bit vague here because really it all depends on what you have to hand. For a domestic size heat bench an old table will be good (I saw 2 in the dump the other day), or - as per the list - pallets or crates are handy.
Building and Insulating Your Base
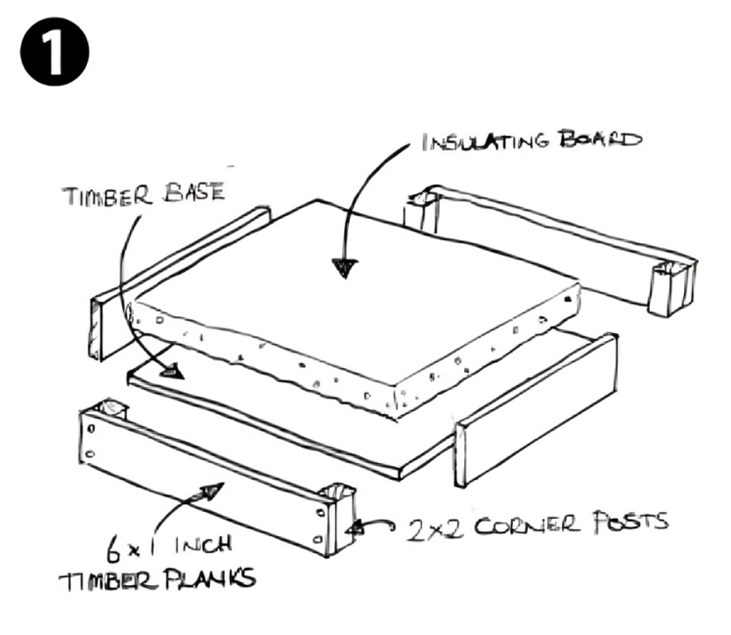
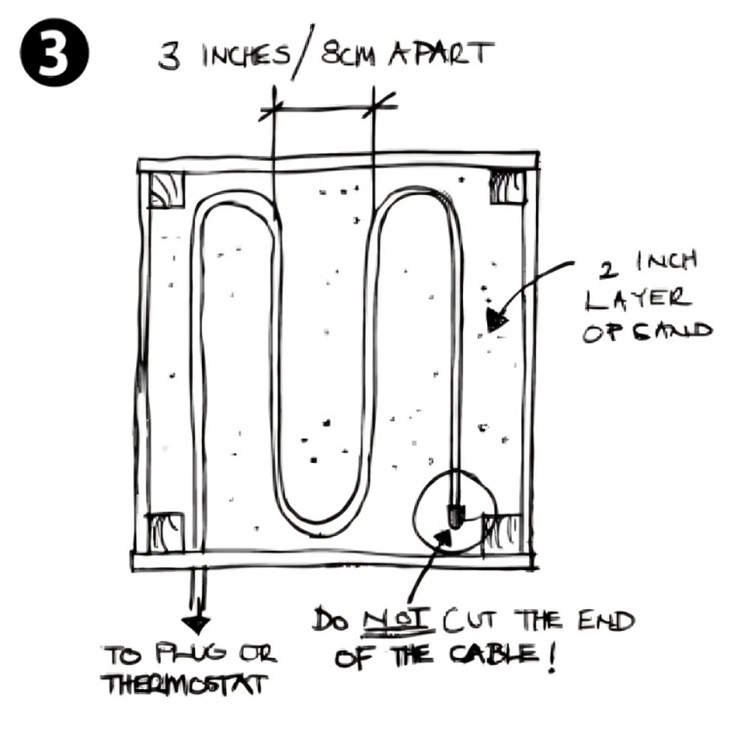
Make up a frame using 6 x 1 inch boards and 2 x 2 inch corner posts. It's square in the illustration but obviously it can be any dimensions you like. I find it easier to use the corner posts instead of screwing straight into the planks, as it gives a much stronger frame and gives you plenty of wood to screw the base to in the next step.
You will be placing a liner in the heat bench frame, so untreated timber will be fine to use - as the timber won't be in contact with the damp sand.
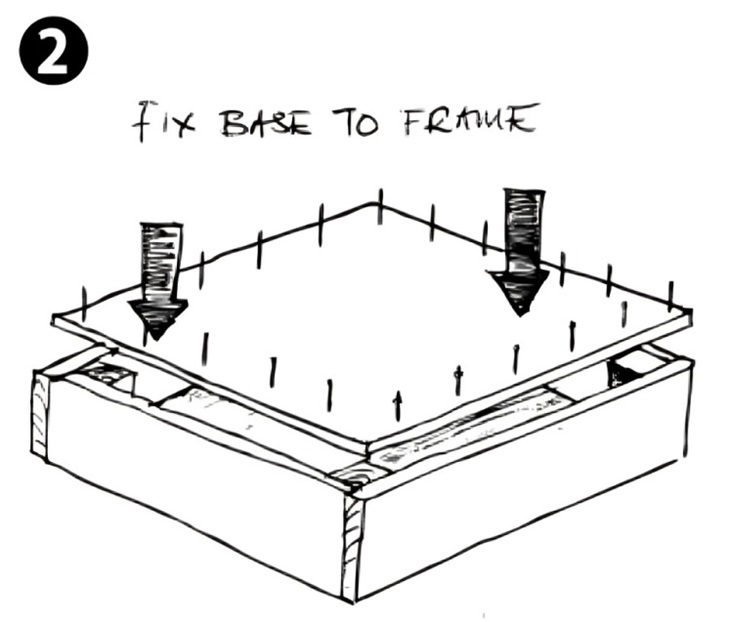
Screw or nail the base board to the frame to make a box with a bottom. Cut the insulating board to size and add it to the base of the propagator box.
Here's the bit everyone gets wrong:
It's important that the sand remains moist to transmit the heat evenly across the heat bench. If the sand dries out, the cable won't be anywhere near as effective.
Line the box with a layer of waterproof plastic sheeting. There's a dark grey heavy D.P.C. plastic available from builders merchants in bulk rolls, but you should be able to get something similar in smaller quantities.
Installing the Heating Cable
Cover the insulated base with a 2 inch layer of sand. Arrange the cable in a linear fashion: as we've said, a bit like an electric blanket. Cables vary, but in general they should be placed 3 inches or 8cm apart. Don't let the cable cross over itself, as this creates a hot spot which can cause damage and failure of the unit.
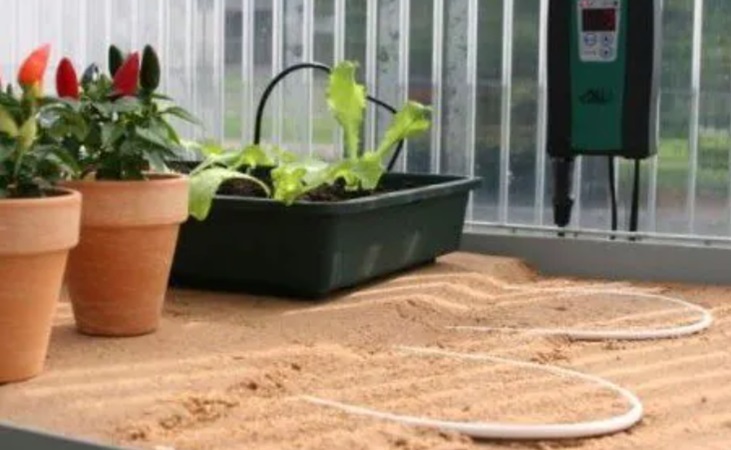
Once the soil warming cable has been laid, cover with another layer of sand. Water the sand - we're not looking for puddles here but it should be thoroughly moist. At this point you can plug in and start to warm up your bench, but I do recommend adding a thermostat to regulate the temperature and make the bench cheaper to run.
Heat Bench Thermostat
To be honest I can't understand why you wouldn't put a thermostat on any heated plant propagator. If you don't it will be on all the time, wasting energy and reaching a temperature that may be unnecessarily high for plant germination. As with any thermostat, the desired temperature can be set - meaning the heat cable is only on if the temperature falls below that required level.
Some soil thermostats use a small probe at the end of a wire that is inserted directly into the compost. This gives a reading of the compost in the particular pot you've placed it in, but it will also give you a good idea of the temperature of everything else in the propagator. If using one of these thermostats, drill a hole in the side of the heat bench which will allow you to slot the probe into the frame.

Bio Green Digital Thermostat - Thermo 2
View ProductSoil Warming Cables
We supply Bio Green's soil warming cables, which are made with flexible silicon. They can be combined with the Thermo 2 digital thermostat to set an optimum temperature in the sand layer around the cable (see the short video below). This cable is available in three lengths, from 6 to 25 metres, so it can cover propagation areas both large and small.
Tips On Using Your Heat Bench Propagator
A good average germination temperature for most crops is 18 to 21˚C. Depending on the air temperature inside your tunnel or greenhouse, your soil cable will heat between 18 and 21˚C (isn't that a coincidence?) at 8cm apart. If the air temp is colder and you need more heat, you can place the cables closer together - but in normal usage this probably won't be necessary.
You can keep your heat bench warmer by making a cover for it, but we just use a few layers of horticultural fleece laid over the seedlings to keep conditions nice and toasty. Fleece is good because it'll keep the heat in but let light through, so your seedlings won't get leggy from lack of light once sprouted. As you know, seeds only need heat and moisture to germinate, but once they've popped up they need light or they will grow tall, weak and spindly.
Also - with the exception of warm climate crops like tomatoes, courgette, chilis etc - most plants should be taken off the heat bench once the seedlings have emerged. You must protect from freezing night time conditions (a layer or two of fleece will work perfectly again here). Fleece is a very light material which will be pushed up by the plants as they grow, so won't damage or hold back tender young plants.

Horticultural Fleece in 2m x 100m bulk rolls
View ProductWarm climate crops, once germinated, can be left on the bench with the temperature turned down a little: as a rule of thumb about 18˚C is fine.
Watering Your Propagation Bench
As we've said, the bench must be kept moist. Check the sand under the pots periodically, and water as required.


