How to make your own Olla Pots for Eco-Friendly Garden Irrigation
It’s always fun to learn about and experiment with a new gardening technique. Olla pots (and the unique way that they work) aren’t exactly new though, far from it. The use of olla (pronounced 'oh-ya') pots is an ancient irrigation method that is still widely used in countries such as Brazil and India or in U.S. states such as New Mexico.
In recent times olla pots have seen renewed popularity. In permaculture circles they are seen as a very eco-friendly and sustainable irrigation method that minimises water usage. In dry, arid or even desert climates they are regarded as an excellent drought-resistant option with genuine observable results.
Benefits of Watering with Olla Pots
- Deliver moisture directly to the plant root zone
- Water only seeps from the pot when it’s needed, thus conserving water usage
- Can easily be used in combination with rainwater harvesting or grey water re-use (doesn’t require a pressurised system)
- Soil surface doesn’t get watered unnecessarily, meaning less chance for weeds to get established
- You don’t have to worry about water evaporating before your plants can absorb it
Related Article: Gardening Tips for Dry Weather
There are some catches, however. They tend to be better suited to smaller growing spaces: a large vegetable bed or plot with many different plants will require the kind of scale of operation that would be better served by a drip irrigation system. They are also probably more suited to larger plants; if you have a variety of smaller vegetables growing in rows they can still be effective but it would require a lot of ollas to supply all of them.
Similarly to methods like drip irrigation, olla pot irrigation can reduce water wastage considerably, saving up to 70% of the water used with more traditional methods.
How Does Olla Irrigation Work?
An olla pot can be created using an unglazed terracotta pot. Terracotta is a porous substance, meaning that it can absorb or release water. Indeed, terracotta containers are often used as a method of air conditioning in some arid regions. Because they essentially ‘sweat’ water, this water can then cool the surrounding air as it evaporates. It’s important that they’re unglazed because the ‘glaze’ - such as a glossy or waterproof finish that is applied to the material - blocks off this porous effect.
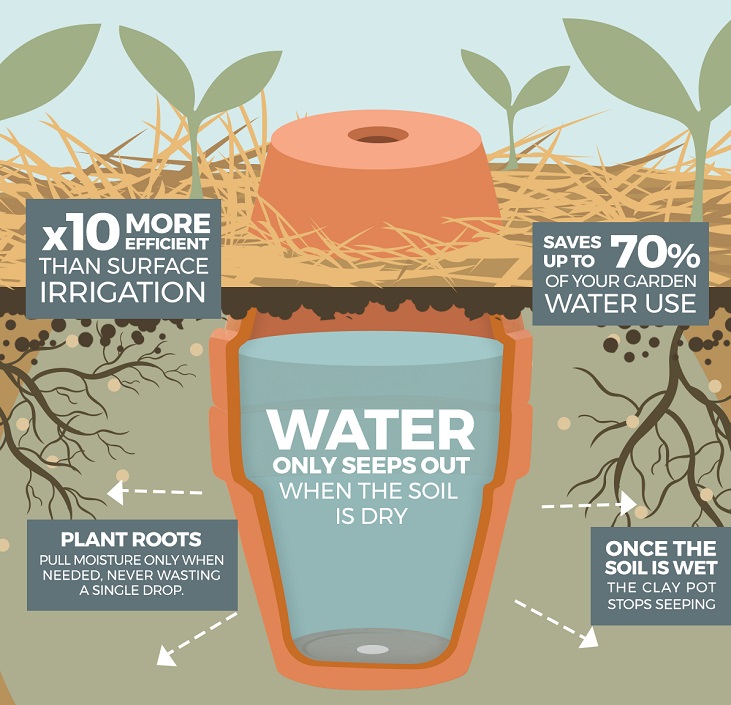
Olla pots can be buried in the soil in the vicinity of the plants you want to water. Here is where things get interesting. The porous material allows water to seep out of the pot, but the seepage doesn’t quite work in the same steady, precise way as drip irrigation does. Instead the water is drawn out by something known as ‘soil moisture tension’. This is where water moves from areas of high moisture concentration to low concentration (or to put it more simply, moisture will naturally spread to the drier areas of soil). Plant roots add to this effect further: they can basically ‘sense’ the moisture source and will grow towards it, while drawing the moisture towards them. This also means that if there has been a period of heavy rainfall, the water will stay within the pot as the soil and the plants have no need for it.
The below infographic from the Permaculture Research Institute illustrates the process really well:
It’s really fascinating to see how plants work in this manner. Often you’ll find that when you remove the olla pot from the soil at the end of the growing season, there will be a network of roots clustered around the area, embracing their water source. We often talk about how encouraging a plant’s roots to seek out moisture in the soil below is better for plant health than spoon-feeding it water. Olla pots are a great example of this process in action. Plants will only seek to draw out the moisture as and when they need it. In some ways it’s similar to the way capillary mats draw moisture up from below using a wick. It’s just that in this case, no physical wick is necessary.

Capillary Matting & Cover
View ProductMoisture tends not to spread too far from the outer edges of the pot, so it’s important to pay attention to placement and have the pot close to the plant roots, while at the same time not constricting root growth. This requires a decent knowledge of plants, which comes with garden experience (although you can also bone up on this info if need be!).
This method of watering can be deceptive at times if you’re used to observing freshly watered soil. It’s common for the top layer of soil around your pot to look dry. However, if you were to examine the soil a couple of inches deeper you would see that it is in fact healthily moistened as the water seeps outward from the buried pot.
It’s important to note that young seedlings will still need some supplementary watering until their roots become established enough to start seeking out and drawing in moisture from the surrounding soil and pots.

Digital Moisture Meter
View Product
What Shape Should They Be?
The best olla pot shape or design can depend on which particular plants you’re growing, your soil type, growing space and other factors. They can be large or compact; the latter size will be more suited to container gardening. Very small olla pots can even be used for house plants.
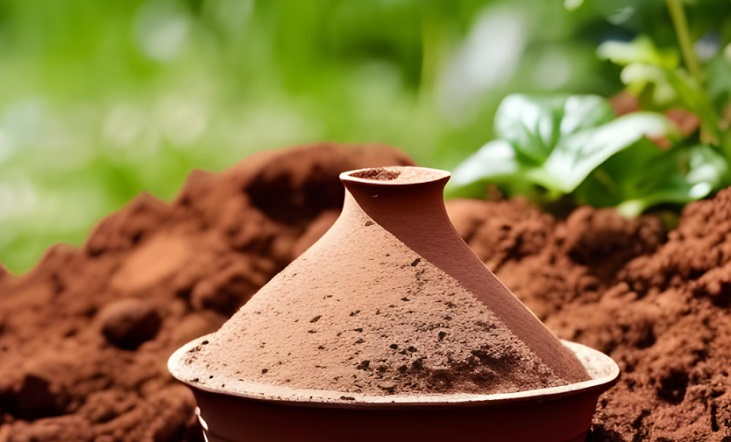
One very effective design has a tapered shape and a narrow ‘neck’ or opening that protrudes from the soil (like an urn). The opening allows the pot to be easily refilled with water without having to disturb the surrounding soil. It can be covered with a rock or some other kind of removable makeshift lid; this prevents evaporation as well as taking away a potential drowning hazard for small soil creatures. You can also apply a mulch around the neck so long as the mulch material is not entering the opening.
Olla Pot Placement
How you place your olla pots is a question that depends on a few factors:
- Are you growing in a container or directly in the soil?
- What plant varieties you are growing
- Do you want each plant to have its own olla source, or do you want each olla pot to provide water for more than one plant?
A rule of thumb often suggested is that the moisture will reach roots for a distance of about the diameter of the pot itself. Other anecdotal evidence would suggest that they can reach twice this far. It’s best to experiment and see; you will be able to tell very easily from the pattern of root growth and the dampness of the sub-soil around the pot.
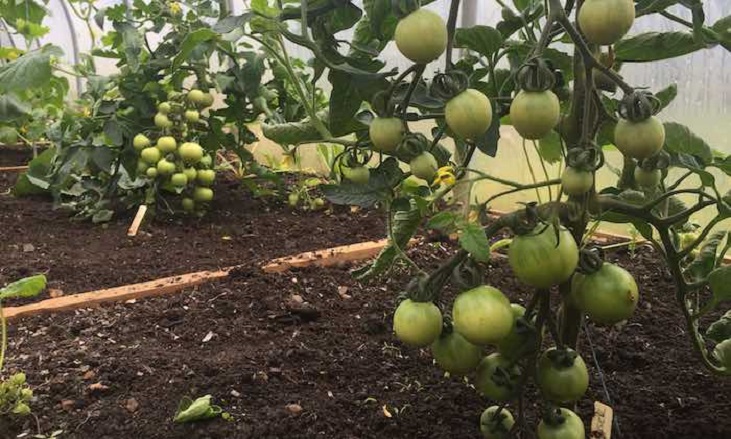
Some plants will be greedy or needy enough to out-compete any nearby plant when it comes to ‘imbibing’ from the olla pot. A thirsty tomato plant for example will often commandeer a pot for itself. Large plants like tomato, eggplant, beans may even benefit from multiple pots in close proximity. A large olla pot, on the other hand, may well be able to serve two medium size plants at once.
Low Maintenance Irrigation
Compared to other watering methods, there is not a lot of maintenance or hard work involved with olla pots. Once you have the pot set up (if it’s homemade then there will of course be some initial creative work involved), it’s really a case of removing the makeshift lid from the opening and filling the pot at regular or semi-regular intervals. This can be daily in very hot conditions, but usually in temperate climates you’re talking about maybe twice a week. It’s not an exact science: it can depend on plant needs, local climate, time of year and soil type. Smaller pots will naturally need to be refilled more regularly, especially in warm weather.
There may be some necessary adjustments to the refilling schedule as you get a feel for just how thirsty your plant roots are. This is of course true of most irrigation methods, whether you’re deciding when to set your drip timer for or pondering whether you need to hand water right now or in a couple of days.
Related Article: Sustainable Gardening
One thing about unglazed terracotta is that it does not go well with very cold conditions. A period of freezing weather followed by a thaw can easily cause the surface of your olla pots to crack. For this reason it’s a good idea to remove your olla pots from the soil at the end of the growing season or before the weather starts getting colder in autumn and winter. Cracks can be sealed with putty or epoxy.
You should aim to keep the pot over 50% full: when it is below 50% there is more chance of mineral and sediment buildup which can affect seepage.
How to Make Olla Pots
There are all kinds of DIY methods of creating your own olla pots for subsurface garden irrigation.
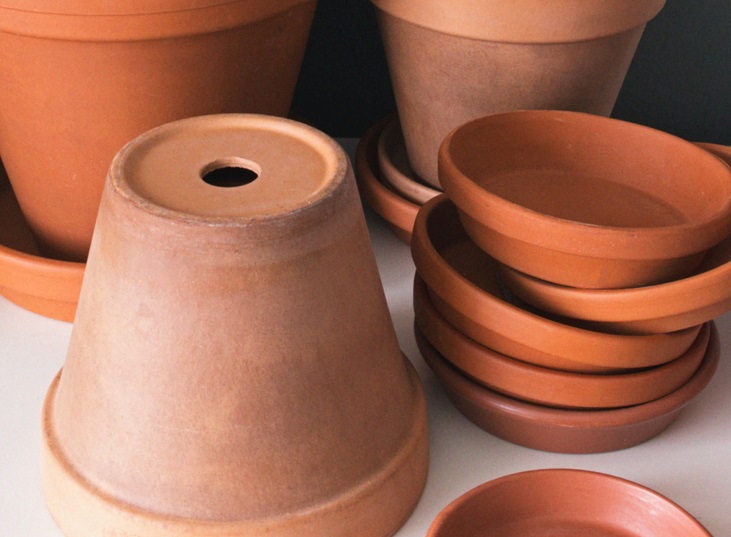
- Unless pottery is one of your hobbies, it’s probably best to start with an unglazed terracotta pot: the material is of course the most important part.
- The next step is to block or seal off the drainage hole at the bottom: this can be done with waterproof sealant putty or food-grade silicone. Once this has been done, you can test the pot or container for leakage at the bottom by filling it with water and allowing it to sit for a while, observing.
- A plant pot saucer (terracotta or otherwise) can be used as a lid, but any item that can cover most of the opening (and is easily removable) will do the job.
- To make a larger pot you can join two pots together: turn one pot upside down and join them together along the rims with some silicone sealant. Leave one of the drainage holes open for refilling.
- Dig a hole in the soil, taking into account what your plant layout and spacing is going to be. Place the pot into the soil and allow for roughly 5cm of the pot at the top to protrude from the soil. You can bury it right up to its neck, but there will be more chance of debris and insects entering the opening.
- Top up the pot regularly, aiming to keep it at least 50% full at any time. How often you refill can depend on weather conditions, the amount or type of plants you’re growing, how large the pot is etc.
Happy experimenting, and let us know how well they work in your garden! We’re always interested to hear about these things.
