The Quickcrop Garden Irrigation System
The Quickcrop Garden Irrigation System can be adapted to suit a range of vegetable garden design layouts using a selection of connectors, hoses, valves and timers which can be arranged and connected according to the shape, size and layout of your vegetable garden.
All vegetables have different individual watering requirements and these will also vary throughout the season according to temperature and weather fluctuations. The Quickcrop Irrigation system can be built to accommodate these needs, providing the ability to incorporate separate watering zones and practice a targeted watering regime.
The timer is the starting point of the distribution system. This is a control box that will turn the water supply on and off at predetermined times, ideal if you are on holiday.

Water will flow from the timer outlet and be diverted though a network of connectors directly to each individual bed.
We recommend isolating each bed as a separate zone, allowing you to control the water supply according to the localised needs of the crop. Any number of beds can be added to this system with each zone receiving an evenly distributed supply.
These individual beds can be laid out according to the plant types and their specific growing patterns and accessed by a network of pipes assembled using a combination of Tee and Elbow connectors. Inline valves can be inserted into this path in order to manually modify the supply to these zones, removing or adding them from the control of the timer whenever necessary. Valves can be added within the bed to isolate individual drills.

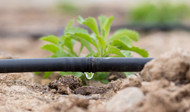
The water reaches the plants from a dripper hose placed on the surface of the soil, soaking into the ground as far as the plant roots. This hose incorporates specially designed emitters which regulate the water flow onto the bed. The emitters are 30cm apart, the optimum distance for adequate water flow in a medium grade soil with moderate drainage. Similarly, the hoses themselves need to be placed 30cm apart. The hoses are closed at the far end with an end plug fitting, preventing water loss and regulating the flow rate, and held in place on the soil surface with pegs placed 1m apart.

Frequently Asked Questions
Is this system easy to put together? The system is easily assembled without the use of any tools. The couplers and hoses use a simple push-fit connector method with a hand tightened cap. The hose can be cut to length with a craft knife or kitchen scissors.
Where should I the place timer? The timer, located at the start of the watering system, should be accessible to the tap water supply. Our timer is of a commercial standard and resilient to water ingress but do take care to ensure it is sheltered from extreme sun or rain.
What water pressure do I need? We recommend a water supply pressure between 1 and 2 Bar.
How do I accommodate the varying needs of each plant? Plant your watering zones carefully, grouping the less thirsty plants. Adjust the supply valves according to the individual plant.
How often should I water the garden? We recommend once every day, although in very hot weather it may be necessary to water again in the evening.
How do I prevent overwatering? Adjusting the timer and isolation valves correctly will prevent unnecessary overwatering.
How long should I water the garden? Although plants have differing take up rates, the soil should be watered until it is completely wet but not waterlogged. Make a few test waterings by hand in order to determine your timer settings.
What should I do if it is raining? Most plants will enjoy the occasional downpour, in which case you may want to switch off your timer until the wet weather passes.
Should I cover the dripper hose? Leave the dripper on the soil surface, allowing the water to soak down to the roots of the plants. If the hose is buried you may be watering below the root level.
How many beds can I connect? As long as the water supply pressure is adequate you can keep adding more beds.
Can this be used for watering borders? The irrigation system is equally adaptable for use in borders, using appropriate lengths of dripper hose as needed.
What is the maximum length of dripper hose? The dripper hose can be used in lengths up to 80m.
Can I change the layout? As plants are harvested and beds allocated to new crops the system can be reconfigured easily. All couplers, hoses and fittings are reusable.
Can I expand the system? More zones and beds can be easily added to the system. Simply add more hose and couplers to the existing layout, changing the Tee and Elbow connectors as needed.
